
Unlocking the Magic: Exploring Acrylic Pouring Techniques for Stunning Art
Acrylic pouring, also known as fluid art, has taken the art world by storm. This captivating technique involves pouring acrylic paints onto a surface, creating mesmerizing patterns and unique abstract designs. The beauty of acrylic pouring lies in its accessibility; it’s a relatively easy art form to pick up, even for beginners. This article delves into various acrylic pouring techniques, offering a comprehensive guide to help you create your own stunning masterpieces. We’ll explore different methods, materials, and tips to elevate your acrylic pouring journey.
What is Acrylic Pouring?
At its core, acrylic pouring is a process of blending acrylic paints with a pouring medium to create a fluid consistency. These paints are then layered or poured onto a canvas or other surface, allowing them to mix and mingle in unpredictable ways. The result is often a vibrant, abstract artwork with swirling colors and unique cell formations. The appeal of acrylic pouring techniques is that each piece is truly one-of-a-kind. There’s an element of surprise and experimentation that makes the process both exciting and rewarding. Whether you’re a seasoned artist or a complete novice, acrylic pouring offers a creative outlet with endless possibilities.
Essential Materials for Acrylic Pouring
Before diving into the techniques, it’s crucial to gather the necessary materials. Here’s a breakdown of the essentials:
- Acrylic Paints: Choose high-quality acrylic paints in a variety of colors. Student-grade paints can work, but professional-grade paints will offer richer pigments and better longevity.
- Pouring Medium: This is essential for creating the fluid consistency needed for pouring. Popular options include Liquitex Pouring Medium, Floetrel, or a mixture of glue and water.
- Canvas or Surface: Stretched canvases are a common choice, but you can also use wood panels, tiles, or even glass. Ensure your surface is clean and primed.
- Cups and Stir Sticks: For mixing your paints and pouring medium.
- Silicone Oil (Optional): Adding a few drops of silicone oil to your paint mixtures can create cells, those mesmerizing circular formations that are highly sought after in acrylic pouring.
- Torch or Heat Gun: Used to pop air bubbles and encourage cell formation. A butane torch is ideal, but a heat gun can also work.
- Level: To ensure your canvas is perfectly level, preventing the paint from running off in one direction.
- Drop Cloth or Protective Covering: Acrylic pouring can be messy, so protect your workspace.
- Gloves: To protect your hands from paint.
Popular Acrylic Pouring Techniques
Now, let’s explore some of the most popular and effective acrylic pouring techniques:
The Dirty Pour
The dirty pour is one of the simplest and most popular acrylic pouring techniques. It involves layering different colors of paint, mixed with pouring medium, into a single cup. Then, you simply pour the entire contents of the cup onto your canvas. The colors will mix and mingle as they flow, creating a unique and unpredictable design.
How to Do It:
- Prepare your paints by mixing each color with pouring medium to a thin, flowing consistency.
- In a separate cup (the “dirty” cup), layer your chosen colors one at a time. Don’t stir!
- Place your canvas on a level surface.
- Slowly pour the paint from the dirty cup onto the canvas, moving the cup around to cover the entire surface.
- Tilt the canvas to spread the paint and create your desired design.
- Use a torch or heat gun to pop any air bubbles and encourage cell formation.
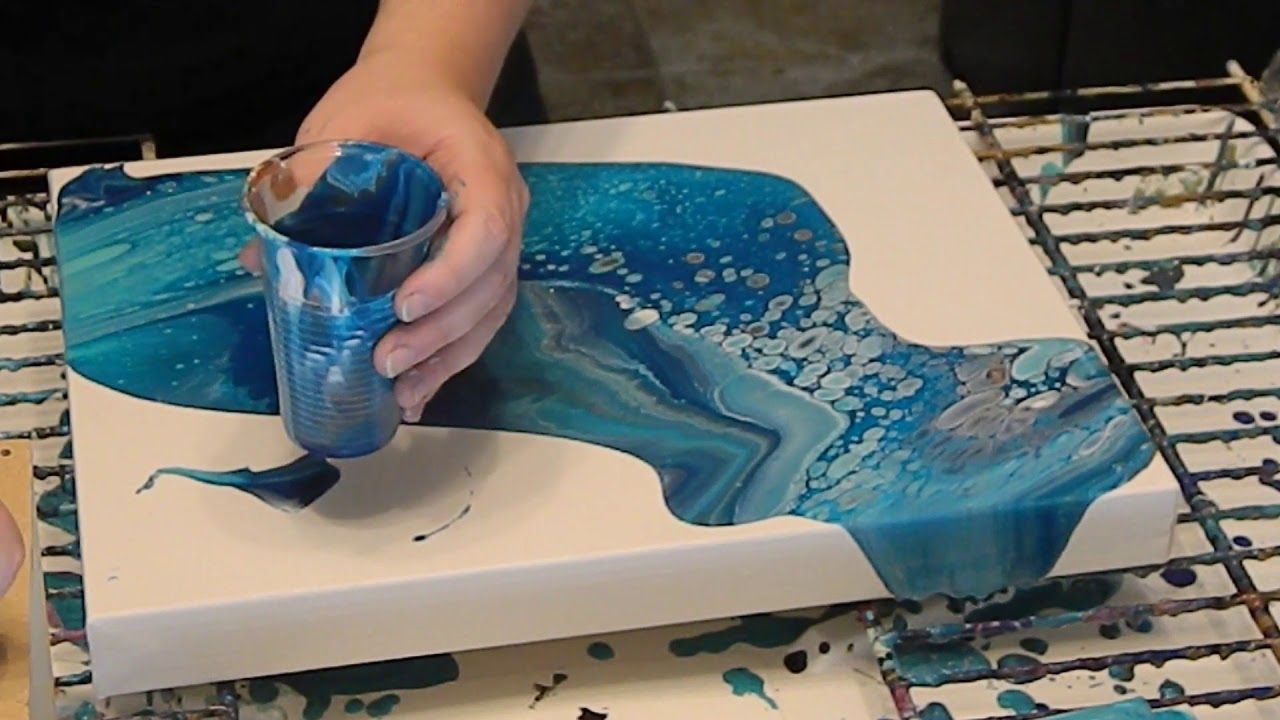
The Flip Cup
The flip cup is another variation of the dirty pour. The main difference is that you flip the cup upside down onto the canvas and let the paint slowly release.
How to Do It:
- Prepare your paints as you would for a dirty pour.
- Layer your chosen colors into a cup.
- Place your canvas on a level surface.
- Place the cup upside down onto the canvas.
- Let the cup sit for a minute or two to allow the paint to settle.
- Slowly lift the cup, allowing the paint to flow out onto the canvas.
- Tilt the canvas to spread the paint.
- Use a torch or heat gun to pop bubbles and encourage cell formation.
The Puddle Pour
The puddle pour involves creating separate puddles of different colors on the canvas. As the puddles merge, they create interesting patterns and color combinations. This technique allows for more control over color placement compared to the dirty pour or flip cup.
How to Do It:
- Prepare your paints with pouring medium.
- Place your canvas on a level surface.
- Pour small puddles of different colors onto the canvas, leaving space between each puddle.
- Tilt the canvas to allow the puddles to merge and flow together.
- Use a straw to gently blow on the paint, creating unique patterns.
- Torch or heat gun to finish.
The Swirl Pour
The swirl pour is similar to the dirty pour, but with an added swirling motion as you pour the paint. This creates a more dynamic and layered effect.
How to Do It:
- Prepare your paints with pouring medium.
- Layer your chosen colors into a cup.
- Place your canvas on a level surface.
- As you pour the paint from the cup onto the canvas, gently swirl the cup around.
- Tilt the canvas to spread the paint.
- Use a torch or heat gun to pop bubbles and encourage cell formation.
The Dip Technique
The dip technique involves dipping an object, such as a canvas or tile, into a container of poured paint. This creates a unique and often unpredictable design. This is one of the more advanced acrylic pouring techniques.
How to Do It:
- Prepare a container with a layer of mixed acrylic paints.
- Slowly dip your canvas or object into the paint.
- Lift the canvas and allow excess paint to drip off.
- Let the paint dry completely.
The String Pull Technique
This technique uses string to create intricate patterns. Soak a string in paint and then drag it across the canvas to leave a unique design. This method allows for a lot of control and precision.
How to Do It:
- Prepare your paints with pouring medium.
- Soak a piece of string in one of your paint colors.
- Lay the string onto the canvas in a desired pattern, leaving one end hanging off the edge.
- Gently pull the string across the canvas, leaving a trail of paint.
- Repeat with different colors and strings to create your design.
Tips for Successful Acrylic Pouring
Here are some essential tips to help you achieve the best results with acrylic pouring techniques:
- Consistency is Key: The consistency of your paint mixture is crucial. Aim for a thin, flowing consistency similar to warm honey. Too thick, and the paint won’t flow properly; too thin, and the colors will blend too much.
- Experiment with Colors: Don’t be afraid to experiment with different color combinations. Complementary colors (e.g., blue and orange) can create vibrant contrast, while analogous colors (e.g., blue, blue-green, and green) offer a more harmonious look.
- Control Your Tilt: The way you tilt your canvas will significantly impact the final design. Practice different tilting techniques to achieve various effects.
- Use Silicone Oil Sparingly: While silicone oil can create beautiful cells, using too much can result in a muddy or greasy-looking finish. Start with a few drops and adjust as needed.
- Be Patient: Acrylic pouring can be unpredictable. Don’t get discouraged if your first few attempts don’t turn out exactly as planned. Practice and experimentation are key.
- Proper Drying: Drying can take several days to a week, depending on the thickness of the paint. Let your artwork dry in a dust-free environment.
- Varnish for Protection: Once your artwork is completely dry, apply a varnish to protect it from UV damage and enhance the colors.
Troubleshooting Common Issues
Even with careful preparation, you may encounter some challenges. Here’s how to troubleshoot common issues:
- Cracking: Cracking can occur if the paint dries too quickly or if the paint layer is too thick. Ensure your paint mixture is properly balanced and allow the artwork to dry slowly in a cool, humid environment.
- Muddy Colors: Muddy colors can result from over-mixing the paints or using too many colors. Try using fewer colors or being more careful when layering them.
- Lack of Cells: If you’re not getting enough cells, try adding a few more drops of silicone oil or using a heat gun for longer.
- Uneven Surface: An uneven surface can cause the paint to pool in certain areas. Ensure your canvas is perfectly level before pouring.
Advanced Techniques and Variations
Once you’ve mastered the basic acrylic pouring techniques, you can explore more advanced variations:
- Resin Coating: Adding a layer of epoxy resin can create a glossy, glass-like finish that enhances the colors and protects the artwork.
- Adding Texture: Incorporate texture by adding sand, glitter, or other materials to your paint mixture.
- Combining Techniques: Experiment with combining different acrylic pouring techniques to create unique and complex designs. For example, you could combine a dirty pour with a string pull.
- Working with Different Surfaces: Try pouring on unconventional surfaces like furniture, decorative objects, or even clothing.
The Allure and Accessibility of Acrylic Pouring
The enduring appeal of acrylic pouring lies in its combination of accessibility and artistic freedom. It’s a technique that welcomes experimentation, celebrates happy accidents, and empowers anyone to create visually stunning art. With the right materials, a little practice, and a willingness to explore, you can unlock your creative potential and produce unique, captivating artworks. So, gather your paints, prepare your canvas, and dive into the mesmerizing world of acrylic pouring techniques.
Whether you’re looking to create abstract art for your home, gifts for loved ones, or simply explore a new creative outlet, acrylic pouring offers a rewarding and fulfilling experience. The possibilities are truly endless, and each pour is a unique adventure. Embrace the process, experiment with different techniques, and discover the magic of fluid art for yourself. Remember to always prioritize safety and proper ventilation when working with acrylic paints and pouring mediums. [See also: Best Acrylic Paints for Beginners] [See also: How to Choose the Right Pouring Medium] [See also: Advanced Acrylic Pouring Techniques]
