Unlocking Creative Concrete: A Deep Dive into Concrete Patio Molds
Concrete patios offer a durable and versatile outdoor living space. While traditionally poured concrete provides a smooth, uniform surface, concrete patio molds open up a world of design possibilities. These molds allow homeowners and contractors to create patios with intricate patterns, textures, and shapes, mimicking the look of more expensive materials like stone or brick. This article explores the various types of concrete patio molds, their benefits, how to use them effectively, and considerations for choosing the right mold for your project. Understanding concrete patio molds is essential for achieving a custom and aesthetically pleasing outdoor space.
What are Concrete Patio Molds?
Concrete patio molds are reusable forms used to shape wet concrete into desired patterns and designs. They are typically made from durable plastic, rubber, or metal and come in a wide variety of shapes, sizes, and styles. These molds allow you to create the look of pavers, cobblestone, flagstone, or even intricate geometric designs without the expense and labor of installing individual stones.
Types of Concrete Patio Molds
- Paver Molds: These molds create individual paver shapes that can be arranged in various patterns.
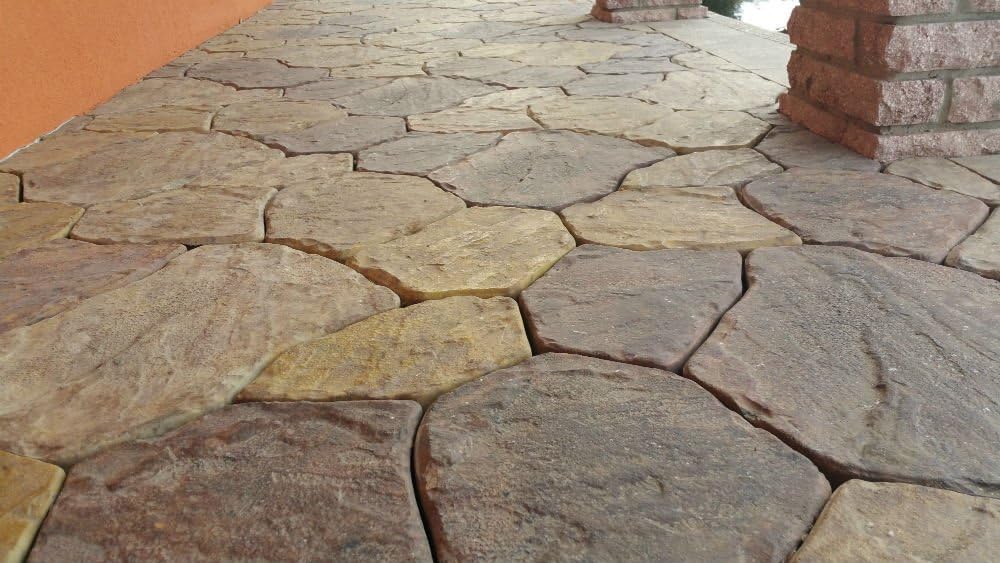
- Flagstone Molds: Designed to mimic the irregular shapes and textures of natural flagstone.
- Cobblestone Molds: Replicate the look of traditional cobblestone streets.
- Tile Molds: Create smooth, uniform tiles in various sizes and shapes.
- Patterned Molds: Feature intricate designs and patterns, such as geometric shapes, floral motifs, or custom logos.
Benefits of Using Concrete Patio Molds
Using concrete patio molds offers several advantages over traditional poured concrete or installing individual pavers:
- Cost-Effective: Molds are a relatively inexpensive way to achieve a high-end look without the cost of natural stone or professional paver installation.
- DIY-Friendly: With a little preparation and the right tools, homeowners can easily create a beautiful and unique patio using concrete patio molds.
- Customizable: Molds allow for endless design possibilities, enabling you to create a patio that perfectly complements your home’s style and landscape.
- Durable: Concrete is a durable and long-lasting material, and when properly installed with molds, it can withstand heavy foot traffic and harsh weather conditions.
- Easy to Maintain: A concrete patio created with molds is relatively easy to clean and maintain. Regular sweeping and occasional power washing are typically sufficient.
How to Use Concrete Patio Molds: A Step-by-Step Guide
Creating a concrete patio with molds requires careful planning and execution. Here’s a step-by-step guide to help you get started:
Step 1: Prepare the Site
The first step is to prepare the area where you’ll be pouring the concrete. This involves removing any existing vegetation, debris, and topsoil. Excavate the area to a depth of at least 4-6 inches to allow for a gravel base and concrete layer. Ensure the excavated area is level and compact the soil thoroughly.
Step 2: Create a Gravel Base
Pour a layer of gravel into the excavated area, spreading it evenly to a depth of 2-4 inches. Compact the gravel base using a plate compactor or hand tamper. This gravel base will provide drainage and prevent the concrete from cracking due to soil movement.
Step 3: Mix the Concrete
Mix the concrete according to the manufacturer’s instructions. Use a concrete mixer for larger projects or mix it by hand in a wheelbarrow for smaller areas. Ensure the concrete is thoroughly mixed and has a consistent consistency. Adding a concrete admixture, such as a plasticizer, can improve workability and reduce cracking. Consider using a fiber-reinforced concrete mix for added strength and durability.
Step 4: Place the Molds
Position the concrete patio molds on the prepared gravel base. Arrange them in the desired pattern, ensuring they are level and properly aligned. You may need to use shims to level the molds on uneven surfaces. Apply a release agent, such as cooking oil or a commercial mold release spray, to the inside of the molds to prevent the concrete from sticking.
Step 5: Pour the Concrete
Carefully pour the concrete into the molds, filling them completely. Use a trowel or float to smooth the surface of the concrete and remove any air pockets. For a textured finish, you can use a brush or sponge to create a desired effect. Ensure the concrete is level with the top of the molds.
Step 6: Curing the Concrete
Curing is a critical step in the concrete pouring process. Cover the poured concrete with plastic sheeting or damp burlap to prevent it from drying out too quickly. Keep the concrete moist for at least 3-7 days. This allows the concrete to hydrate properly and develop its full strength.
Step 7: Remove the Molds
After the concrete has cured for the recommended time, carefully remove the molds. Gently tap the sides of the molds to loosen them, and then lift them off the concrete. If the concrete is still too soft, wait a few more days before removing the molds.
Step 8: Finishing Touches
Once the molds have been removed, you can apply a concrete sealer to protect the patio from stains and weather damage. Choose a sealer that is appropriate for outdoor use and follow the manufacturer’s instructions. You can also fill the joints between the concrete pavers with sand or polymeric sand to prevent weed growth and provide a more finished look. Consider adding decorative aggregates or staining the concrete for a more customized appearance. The possibilities for enhancing your concrete patio are endless.
Choosing the Right Concrete Patio Molds
Selecting the right concrete patio molds is crucial for achieving the desired look and functionality. Consider the following factors when choosing molds:
- Style and Design: Choose molds that complement your home’s architectural style and landscape. Consider the overall aesthetic you want to achieve, whether it’s a rustic, modern, or traditional look.
- Size and Shape: Select molds that are appropriate for the size and shape of your patio. Larger molds will cover more area quickly, while smaller molds allow for more intricate designs.
- Material: Molds are typically made from plastic, rubber, or metal. Plastic molds are lightweight and inexpensive, while rubber molds are more flexible and durable. Metal molds are the most durable but can be more difficult to work with.
- Durability: Choose molds that are made from high-quality materials and are designed to withstand repeated use. Look for molds that are resistant to cracking, warping, and fading.
- Ease of Use: Select molds that are easy to handle and remove. Molds with a smooth surface and a slight taper will be easier to release from the concrete.
Maintaining Your Concrete Patio
Proper maintenance is essential for extending the life of your concrete patio. Here are some tips for keeping your patio looking its best:
- Regular Cleaning: Sweep the patio regularly to remove dirt, leaves, and debris. Wash the patio with a mild detergent and water as needed.
- Power Washing: Power washing can be used to remove stubborn stains and mildew. However, be careful not to use too much pressure, as this can damage the concrete surface.
- Sealing: Apply a concrete sealer every 1-2 years to protect the patio from stains and weather damage.
- Repairing Cracks: Repair any cracks in the concrete as soon as possible to prevent further damage. Use a concrete crack filler to fill small cracks and a concrete patching compound for larger cracks.
- Winter Protection: In cold climates, protect the patio from freeze-thaw cycles by applying a de-icing salt that is specifically designed for concrete. Avoid using rock salt, as it can damage the concrete surface.
Conclusion
Concrete patio molds offer a versatile and cost-effective way to create a beautiful and durable outdoor living space. With a little planning and effort, you can transform your backyard into a stunning oasis using these molds. By understanding the different types of molds, following the proper installation techniques, and maintaining your patio regularly, you can enjoy your custom-designed concrete patio for years to come. Whether you’re a seasoned DIYer or a first-time homeowner, concrete patio molds provide an accessible and rewarding way to enhance your outdoor living experience. So, unlock your creative potential and start designing your dream patio today! Consider exploring different staining techniques to further customize your patio’s appearance. [See also: Concrete Staining Techniques for Outdoor Patios]
