The Ultimate Guide to Silicone Sealant Removal: Techniques and Best Practices
Silicone sealant is a versatile and widely used material for creating waterproof and airtight seals in various applications, from bathrooms and kitchens to windows and aquariums. However, over time, silicone sealant can degrade, become discolored, or simply need replacement. The process of silicone sealant removal can be tricky, but with the right tools and techniques, it can be done effectively and efficiently. This comprehensive guide will provide you with the necessary information to tackle silicone sealant removal like a pro.
Why Remove Silicone Sealant?
Before diving into the how-to, it’s important to understand why silicone sealant removal becomes necessary. Here are some common reasons:
- Degradation: Over time, silicone sealant can become brittle, cracked, or discolored due to exposure to moisture, UV rays, and temperature fluctuations.
- Mold and Mildew Growth: Silicone sealant provides an ideal surface for mold and mildew to thrive, especially in damp environments like bathrooms.
- Damage: Physical damage or wear and tear can compromise the sealant’s integrity, leading to leaks and reduced effectiveness.
- Renovation: During home renovations, old silicone sealant may need to be removed to prepare surfaces for new installations.
- Aesthetic Reasons: Sometimes, simply wanting a fresh, clean look is reason enough to remove and replace old sealant.
Tools and Materials Needed for Silicone Sealant Removal
Having the right tools and materials on hand will make the silicone sealant removal process significantly easier and more efficient. Here’s a checklist of essential items:
- Utility Knife or Sealant Removal Tool: A sharp utility knife or specialized sealant removal tool is crucial for cutting through the sealant.
- Scraper: A plastic or metal scraper helps to lift and remove the loosened sealant. Avoid using sharp metal scrapers on delicate surfaces to prevent damage.
- Pliers or Tweezers: These tools are useful for gripping and pulling away stubborn pieces of sealant.
- Solvent or Silicone Sealant Remover: Chemical solvents designed to dissolve silicone sealant can be very effective, especially for removing residue.
- Soft Cloths or Rags: For wiping away dissolved sealant and cleaning surfaces.
- Spray Bottle: For applying solvent or cleaning solutions.
- Safety Glasses and Gloves: Protecting your eyes and hands is essential when working with tools and chemicals.
- Ventilation: Ensure adequate ventilation in the work area, especially when using solvents.
Step-by-Step Guide to Silicone Sealant Removal
Follow these steps to effectively remove silicone sealant:
Step 1: Prepare the Area
Before you begin, clear the area around the sealant. Cover any surfaces that you want to protect from scratches or solvent damage. Ensure good ventilation by opening windows or using a fan.
Step 2: Soften the Sealant
Apply a solvent-based silicone sealant remover to the sealant. Follow the manufacturer’s instructions for application and dwell time. This helps to soften the sealant, making it easier to remove. Alternatively, a heat gun can be used carefully to soften the sealant, but be cautious not to overheat and damage surrounding surfaces. [See also: Choosing the Right Sealant for Your Project]
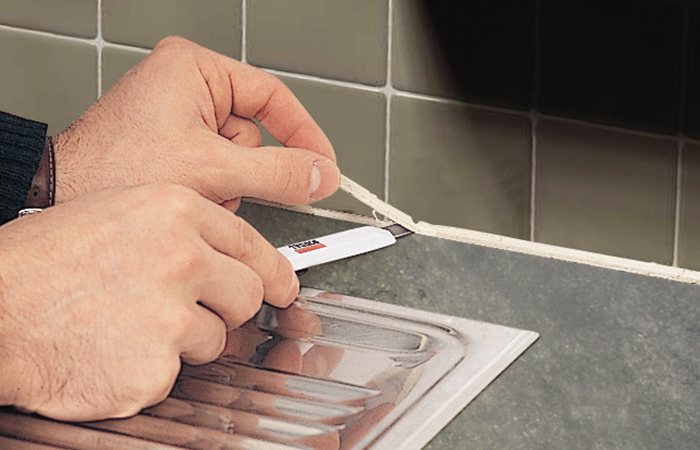
Step 3: Cut Through the Sealant
Using a utility knife or sealant removal tool, carefully cut along both edges of the sealant bead. Apply steady pressure and avoid cutting into the underlying surface. If the sealant is thick, you may need to make multiple passes. The goal is to separate the sealant from the surfaces it’s adhered to. Be extremely careful with sharp objects.
Step 4: Remove the Bulk of the Sealant
Insert a scraper or the tip of the utility knife under the loosened sealant and gently lift it away from the surface. Use pliers or tweezers to grip and pull away stubborn sections. Work slowly and carefully to avoid leaving behind small pieces of sealant. Discard the removed sealant properly.
Step 5: Remove Remaining Residue
After removing the bulk of the sealant, there will likely be some residue left behind. Apply more silicone sealant remover to the remaining residue and let it sit for a few minutes. Then, use a scraper or a soft cloth to gently scrub away the residue. Repeat this process as needed until the surface is clean. For particularly stubborn residue, a more aggressive solvent or a specialized residue remover may be necessary.
Step 6: Clean and Prepare the Surface
Once the sealant and residue are removed, clean the surface with a mild detergent and water to remove any remaining solvent or debris. Allow the surface to dry completely before applying new sealant. Inspect the surface for any damage or imperfections and address them before resealing. A clean, dry, and smooth surface is essential for proper adhesion of the new sealant. [See also: Preparing Surfaces for Sealant Application]
Tips and Tricks for Effective Silicone Sealant Removal
- Work in Sections: If you’re dealing with a large area of sealant, work in small sections to maintain control and prevent the solvent from drying out.
- Use the Right Tool: Choose the right tool for the job. A plastic scraper is less likely to damage delicate surfaces than a metal one.
- Be Patient: Rushing the process can lead to incomplete removal and potential damage. Take your time and work carefully.
- Ventilation is Key: Always ensure good ventilation when working with solvents to avoid inhaling harmful fumes.
- Test the Solvent: Before applying solvent to a large area, test it on a small, inconspicuous spot to ensure it doesn’t damage the surface.
- Heat Gun Caution: If using a heat gun, keep it moving and avoid overheating the sealant or surrounding surfaces.
- Multiple Applications: For very old or stubborn sealant, multiple applications of solvent may be necessary.
Choosing the Right Silicone Sealant Remover
There are various silicone sealant removers available on the market, each with its own strengths and weaknesses. Some are solvent-based, while others are enzyme-based. Solvent-based removers are generally more effective at dissolving silicone sealant, but they may also be more aggressive and require better ventilation. Enzyme-based removers are less harsh but may take longer to work. Consider the type of sealant you’re removing, the surface you’re working on, and your personal preferences when choosing a remover. Always read and follow the manufacturer’s instructions carefully. The right silicone sealant removal product can make a huge difference.
Safety Precautions
Safety should always be a top priority when undertaking any DIY project, including silicone sealant removal. Here are some essential safety precautions to keep in mind:
- Wear Protective Gear: Always wear safety glasses and gloves to protect your eyes and hands from chemicals and sharp tools.
- Ensure Ventilation: Work in a well-ventilated area to avoid inhaling harmful fumes from solvents.
- Read Instructions: Carefully read and follow the manufacturer’s instructions for all tools and chemicals.
- Proper Disposal: Dispose of used sealant and solvent-soaked rags properly, following local regulations.
- Keep Away from Children and Pets: Store tools and chemicals out of reach of children and pets.
- First Aid: Have a first aid kit readily available in case of accidents.
Alternative Methods for Silicone Sealant Removal
While chemical solvents are often the most effective method for silicone sealant removal, there are some alternative approaches you can try:
- Mechanical Removal: Using a combination of a sharp utility knife and a scraper to physically remove the sealant. This method requires patience and care to avoid damaging the surface.
- Steam: Applying steam to the sealant can help to soften it, making it easier to scrape away. This method is less aggressive than using solvents and may be suitable for delicate surfaces.
- Homemade Solutions: Some people have reported success using homemade solutions such as vinegar or baking soda paste to soften and remove sealant. However, these methods may not be as effective as commercial removers.
Preventing Future Silicone Sealant Issues
Once you’ve successfully removed the old sealant, you’ll want to take steps to prevent future problems. Here are some tips:
- Choose High-Quality Sealant: Invest in a high-quality silicone sealant that is specifically designed for the intended application.
- Proper Application: Apply the sealant correctly, ensuring a smooth and even bead.
- Regular Cleaning: Clean the sealant regularly to prevent mold and mildew growth.
- Maintain Ventilation: Ensure good ventilation in damp areas like bathrooms to reduce moisture buildup.
- Inspect Regularly: Periodically inspect the sealant for signs of damage or degradation and address any issues promptly.
Conclusion
Silicone sealant removal can be a challenging task, but with the right tools, techniques, and a bit of patience, it can be done effectively. By following the steps outlined in this guide, you can successfully remove old or damaged sealant and prepare surfaces for new applications. Remember to prioritize safety and take your time to achieve the best results. Whether you’re a seasoned DIY enthusiast or a first-time homeowner, mastering the art of silicone sealant removal is a valuable skill that will save you time and money in the long run. Good luck!
