Painting Sunset Sky Acrylic: A Comprehensive Guide for Artists
Capturing the vibrant hues and ethereal beauty of a sunset sky in acrylic paint is a rewarding artistic endeavor. This guide provides a comprehensive overview of techniques, materials, and tips for creating stunning painting sunset sky acrylic artworks. Whether you’re a beginner or an experienced artist, you’ll find valuable insights to enhance your skills and bring your vision to life.
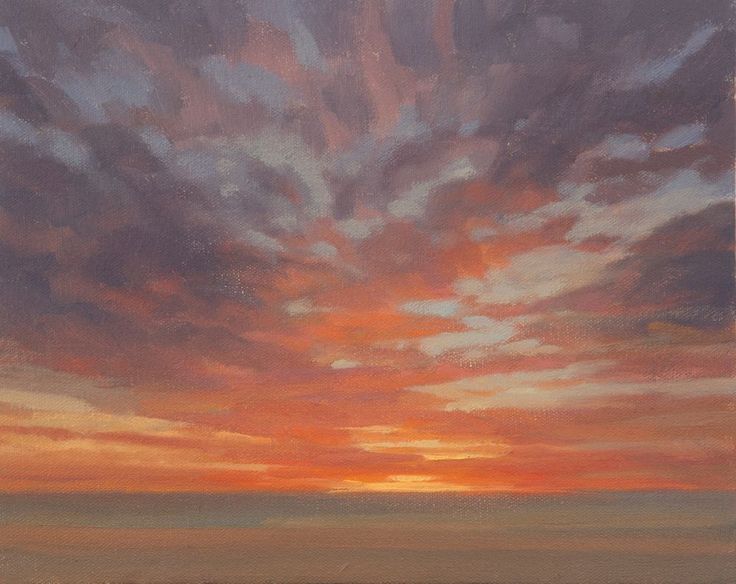
Understanding the Sunset Sky
Before diving into the painting process, it’s crucial to understand the characteristics of a sunset sky. Sunsets are dynamic displays of color influenced by atmospheric conditions, time of day, and geographical location. Key elements to observe include:
- Color Variations: Sunsets exhibit a wide spectrum of colors, from warm oranges and reds to cool blues and purples. These colors shift and blend as the sun dips below the horizon.
- Cloud Formations: Clouds play a significant role in reflecting and scattering sunlight, creating dramatic effects. Observe the shapes, sizes, and positions of clouds in the sky.
- Light and Shadow: The interplay of light and shadow is essential for creating depth and dimension. Notice how sunlight illuminates certain areas while leaving others in shadow.
- Atmospheric Perspective: Distant objects appear fainter and bluer due to atmospheric haze. This phenomenon, known as atmospheric perspective, can enhance the sense of depth in your paintings.
Essential Materials for Acrylic Sunset Paintings
To embark on your painting sunset sky acrylic journey, gather the following materials:
- Acrylic Paints: A range of acrylic colors is essential for capturing the nuances of a sunset. Consider warm colors like cadmium red, cadmium orange, yellow ochre, and alizarin crimson. For cooler tones, include ultramarine blue, cerulean blue, and dioxazine purple. Titanium white is crucial for mixing tints and creating highlights.
- Canvas or Painting Surface: Choose a canvas or painting surface that suits your preference. Stretched canvases are a popular choice, but you can also use canvas boards, wood panels, or even heavy-duty paper.
- Brushes: A variety of brushes is needed for different techniques. Flat brushes are ideal for applying broad strokes and blending colors. Round brushes are suitable for detail work and creating fine lines. Filbert brushes offer a versatile option for both blending and detail work.
- Palette: A palette is used to hold and mix your paints. A disposable palette or a wet palette can be helpful for keeping your paints moist.
- Palette Knife: A palette knife is useful for mixing paints and applying thick layers of paint to the canvas.
- Water Container: Keep a container of clean water nearby for rinsing your brushes.
- Paper Towels or Rags: Use paper towels or rags to wipe your brushes and clean up spills.
- Easel (Optional): An easel can provide a comfortable and stable surface for painting.
- Mediums (Optional): Acrylic mediums can be used to modify the properties of your paints. For example, a glazing medium can create transparent layers of color, while a retarder can slow down the drying time of your paints.
Step-by-Step Guide to Painting a Sunset Sky with Acrylics
Follow these steps to create your own stunning painting sunset sky acrylic masterpiece:
Step 1: Prepare Your Canvas
Prime your canvas with a layer of gesso to create a smooth and even surface for painting. Allow the gesso to dry completely before proceeding.
Step 2: Sketch the Composition
Lightly sketch the main elements of your composition onto the canvas using a pencil. This will help you establish the placement of the horizon line, clouds, and other features. Keep it loose and don’t worry about perfection at this stage.
Step 3: Apply the Base Colors
Begin by applying a thin layer of base colors to the sky. Start with the lightest colors at the horizon line and gradually transition to darker colors towards the top of the canvas. Use a large flat brush to blend the colors seamlessly. Consider starting with a wash of thinned acrylics to create a smooth underpainting.
Step 4: Add Cloud Formations
Using a variety of brushes, add cloud formations to the sky. Observe the shapes, sizes, and positions of clouds in your reference photo or memory. Use lighter colors to highlight the tops of the clouds and darker colors to create shadows. Experiment with different brushstrokes to create texture and movement. This is where the magic of painting sunset sky acrylic really comes to life.
Step 5: Create Depth and Dimension
Use atmospheric perspective to create depth and dimension in your painting. Apply fainter and bluer colors to distant objects to simulate atmospheric haze. This will help to push those elements back in space and create a sense of distance.
Step 6: Add Highlights and Details
Add highlights and details to your painting to enhance its realism and visual interest. Use a small round brush to add fine lines and details to the clouds and other features. Apply highlights to the areas that are most illuminated by the sun.
Step 7: Blend and Refine
Take a step back and assess your painting. Blend any harsh edges and refine the details as needed. Use a clean, dry brush to soften the transitions between colors. Continue to build up layers of paint until you achieve the desired effect.
Step 8: Varnish (Optional)
Once your painting is dry, you can apply a layer of varnish to protect it from dust and UV light. Choose a varnish that is specifically designed for acrylic paints. Follow the manufacturer’s instructions carefully.
Tips for Painting a Realistic Sunset Sky
Here are some additional tips to help you create a realistic painting sunset sky acrylic:
- Use Reference Photos: Reference photos can be invaluable for capturing the colors, cloud formations, and lighting of a sunset.
- Observe the Sky: Take time to observe the sky in person. Notice the subtle variations in color and light.
- Mix Your Colors Carefully: Pay attention to the color mixing process. Experiment with different combinations of colors to achieve the desired hues.
- Use Thin Layers of Paint: Applying thin layers of paint allows you to build up the colors gradually and create a smoother, more luminous effect.
- Don’t Be Afraid to Experiment: Don’t be afraid to experiment with different techniques and approaches. The key is to find what works best for you.
- Consider the Time of Day: Sunsets vary dramatically depending on the time of day. Early sunsets tend to have more vibrant colors, while later sunsets may be more muted.
- Think About the Season: The colors of a sunset can also vary depending on the season. Winter sunsets may have cooler tones, while summer sunsets may have warmer tones.
- Practice Regularly: The more you practice, the better you will become at painting sunset skies.
Advanced Techniques for Painting Sunset Skies
For artists seeking to push their skills further, consider exploring these advanced techniques for painting sunset sky acrylic:
- Glazing: Glazing involves applying thin, transparent layers of color over existing layers. This technique can create depth and luminosity in your paintings.
- Dry Brushing: Dry brushing involves using a dry brush with very little paint to create a textured effect. This technique can be used to create the appearance of clouds or foliage.
- Palette Knife Painting: Palette knife painting involves applying thick layers of paint to the canvas using a palette knife. This technique can create a bold and expressive effect.
- Mixed Media: Experiment with incorporating other materials into your acrylic paintings, such as collage elements or texture pastes.
Common Mistakes to Avoid
When painting sunset sky acrylic, be mindful of these common mistakes:
- Using Too Much Paint: Applying too much paint can result in a muddy or overworked appearance.
- Over-Blending: Over-blending can flatten the colors and reduce the sense of depth.
- Ignoring Atmospheric Perspective: Failing to incorporate atmospheric perspective can make your paintings look flat and unrealistic.
- Not Using Reference Photos: Relying solely on memory can lead to inaccuracies in your paintings.
- Giving Up Too Soon: Painting a sunset sky can be challenging, but it’s important to persevere and not give up too soon.
Inspiration and Resources
To find inspiration and resources for painting sunset sky acrylic, explore the following:
- Online Art Galleries: Browse online art galleries to see how other artists have captured sunset skies in acrylic paint.
- Art Books and Magazines: Consult art books and magazines for tips, techniques, and inspiration.
- Online Tutorials: Watch online tutorials to learn specific techniques and approaches.
- Art Workshops: Attend art workshops to learn from experienced instructors.
- Local Art Groups: Join local art groups to connect with other artists and share your work.
Mastering the art of painting sunset sky acrylic takes time, practice, and dedication. By understanding the principles of color, light, and composition, and by experimenting with different techniques, you can create breathtaking artworks that capture the beauty and wonder of the sunset sky. Remember to observe the world around you, embrace experimentation, and most importantly, enjoy the creative process. The possibilities are endless when you’re painting a sunset sky!
[See also: Acrylic Painting Techniques for Beginners]
[See also: Color Mixing Guide for Acrylics]
[See also: Landscape Painting Tips and Tricks]
