How to Remove Tar from Car: A Comprehensive Guide
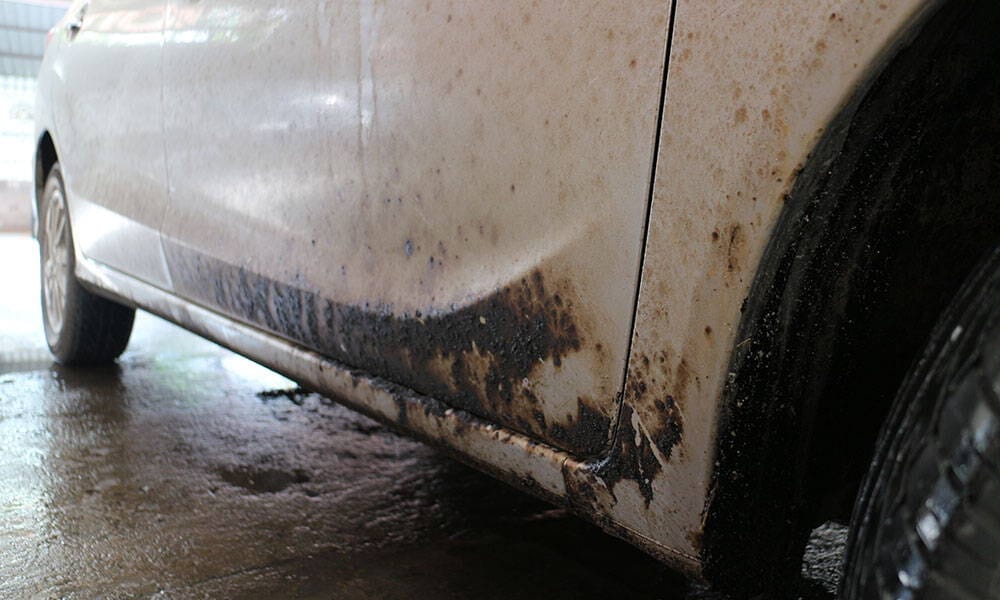
Discovering tar splatters on your car’s paintwork can be frustrating. Tar, a sticky byproduct of asphalt and road construction, is a common nuisance for drivers. If left untreated, it can harden and potentially damage your car’s finish. Understanding how to remove tar from car effectively is crucial for maintaining your vehicle’s appearance and preventing long-term damage. This comprehensive guide provides step-by-step instructions, essential tools, and preventative measures to help you tackle this problem head-on.
Understanding Tar and Its Impact on Your Car
Tar is a dark, viscous material composed of hydrocarbons and free carbon. It originates from the distillation of organic materials, such as coal and petroleum. When hot asphalt is laid on roads, small droplets of tar can flick up and land on passing vehicles. These droplets quickly cool and harden, adhering strongly to the car’s surface.
The impact of tar on your car goes beyond mere aesthetics. Tar can:
- Damage the Paintwork: Tar contains chemicals that can react with your car’s clear coat, causing staining, discoloration, and even etching if left for extended periods.
- Attract Dirt and Grime: Its sticky nature attracts dust, dirt, and other road debris, further compromising the paint’s integrity.
- Reduce Resale Value: A car with visible tar spots appears neglected, potentially affecting its resale value.
Essential Tools and Materials for Tar Removal
Before you begin, gather the necessary tools and materials. Having everything at hand will streamline the process and ensure you achieve the best results.
- Tar Remover: A specialized tar remover is essential. Look for products specifically designed for automotive use. These are formulated to dissolve tar without harming the paint.
- Microfiber Towels: Soft, clean microfiber towels are crucial for wiping away the dissolved tar. Avoid using abrasive cloths that could scratch the paint.
- Wash Mitt: A high-quality wash mitt will help you gently clean the area before and after tar removal.
- Car Wash Soap: Use a pH-neutral car wash soap to safely clean your car.
- Detailing Clay (Optional): Detailing clay can be used to remove stubborn tar residue after using tar remover.
- Clay Lubricant (Optional): If using detailing clay, you’ll need a clay lubricant to prevent scratching.
- Spray Bottle: A spray bottle is useful for applying tar remover precisely.
- Gloves: Protect your hands from the chemicals in the tar remover by wearing gloves.
- Water Hose or Pressure Washer: For rinsing the car.
Step-by-Step Guide: How to Remove Tar from Car
Follow these steps to safely and effectively remove tar from car:
Step 1: Wash the Affected Area
Begin by washing the area with car wash soap and water. This removes loose dirt and debris, preventing them from scratching the paint during the tar removal process. Rinse thoroughly.
Step 2: Apply Tar Remover
Shake the tar remover well and apply it directly to the tar spots. Use a spray bottle for precise application. Allow the product to dwell for the time specified on the label (usually a few minutes). Avoid letting the tar remover dry on the surface.
Step 3: Wipe Away the Dissolved Tar
Using a clean microfiber towel, gently wipe away the dissolved tar. Use a circular motion and apply light pressure. If the tar is particularly stubborn, you may need to reapply the tar remover and allow it to dwell for a longer period.
Step 4: Inspect and Repeat if Necessary
After wiping, inspect the area to ensure all the tar has been removed. If you still see residue, repeat steps 2 and 3. Be patient and avoid excessive scrubbing, which can damage the paint.
Step 5: Use Detailing Clay (Optional)
For stubborn tar residue, detailing clay can be effective. Spray the area with clay lubricant and gently rub the clay bar over the surface. The clay will lift the remaining tar particles. Knead the clay frequently to expose a clean surface.
Step 6: Wash and Rinse Again
After removing the tar, wash the area again with car wash soap and water to remove any remaining tar remover or clay lubricant. Rinse thoroughly.
Step 7: Wax or Seal the Area
Once the area is clean and dry, apply a coat of wax or sealant to protect the paint. This will create a barrier against future tar deposits and other contaminants.
Choosing the Right Tar Remover
Selecting the right tar remover is crucial for a successful and safe tar removal process. Consider these factors when choosing a product:
- Solvent-Based vs. Water-Based: Solvent-based tar removers are generally more effective at dissolving tar quickly, but they can be harsher on the paint. Water-based removers are gentler but may require more dwell time and multiple applications.
- VOC Content: Volatile Organic Compounds (VOCs) can be harmful to the environment and your health. Look for low-VOC products whenever possible.
- User Reviews: Read online reviews to get an idea of the product’s effectiveness and safety.
- Paint Compatibility: Ensure the tar remover is compatible with your car’s paint finish. Check the product label for specific warnings or recommendations.
Preventative Measures to Minimize Tar Buildup
Prevention is always better than cure. Here are some preventative measures to minimize tar buildup on your car:
- Avoid Driving on Freshly Paved Roads: If possible, avoid driving on roads that have recently been paved or sealed.
- Wash Your Car Regularly: Regular washing helps remove tar before it hardens and becomes difficult to remove.
- Apply Wax or Sealant: A good coat of wax or sealant provides a protective barrier against tar and other contaminants.
- Consider Paint Protection Film (PPF): PPF is a clear film that can be applied to your car’s paint to protect it from scratches, chips, and tar.
Dealing with Stubborn Tar Spots
Sometimes, tar spots can be particularly stubborn and difficult to remove. Here are some tips for dealing with these situations:
- Multiple Applications: Don’t be afraid to apply tar remover multiple times, allowing it to dwell for the recommended time each time.
- Heat: Gently warming the tar spot with a heat gun or hairdryer can help soften it, making it easier to remove. Be careful not to overheat the paint.
- Professional Detailing: If you’re unable to remove the tar yourself, consider taking your car to a professional detailer. They have the tools and expertise to safely remove even the most stubborn tar spots.
Common Mistakes to Avoid When Removing Tar
Avoiding these common mistakes will help you remove tar from car safely and effectively:
- Using Abrasive Cleaners: Never use abrasive cleaners or scouring pads, as they can scratch the paint.
- Applying Excessive Pressure: Avoid applying excessive pressure when wiping away the tar. Let the tar remover do the work.
- Letting Tar Remover Dry: Never let tar remover dry on the surface, as it can leave a residue or damage the paint.
- Ignoring the Instructions: Always follow the instructions on the tar remover label.
Alternative Tar Removal Methods (Use with Caution)
While specialized tar removers are the safest and most effective option, some people suggest alternative methods. However, these methods should be used with caution, as they can potentially damage the paint:
- WD-40: WD-40 can dissolve tar, but it can also strip away wax and sealant. Use it sparingly and wash the area thoroughly afterward.
- Peanut Butter: The oils in peanut butter can help loosen tar. Apply a small amount to the tar spot, let it sit for a few minutes, and then wipe it away.
- Cooking Oil: Similar to peanut butter, cooking oil can help loosen tar. Apply it to the tar spot, let it sit, and then wipe it away.
Important Note: Always test any alternative method on an inconspicuous area of your car’s paint before applying it to the entire affected area.
Conclusion: Keeping Your Car Tar-Free
How to remove tar from car doesn’t have to be a daunting task. By understanding the nature of tar, using the right tools and materials, and following a step-by-step approach, you can effectively remove tar spots and maintain your car’s pristine appearance. Remember to take preventative measures to minimize tar buildup and address any issues promptly. With proper care and attention, your car will stay looking its best, mile after mile.
By implementing these techniques and continuously monitoring your car’s exterior, you’ll be well-equipped to deal with tar and any other road grime that comes your way. Consider reading more about [See also: Best Car Cleaning Practices] or [See also: Car Detailing for Beginners] for more information on car care.
