
How to Remove Overspray from Car Paint: A Comprehensive Guide
Overspray, the bane of any car enthusiast’s existence, is the accidental deposit of paint particles on surfaces not intended to be painted. This can happen due to nearby construction, auto body shops, or even your own DIY projects gone slightly awry. Discovering overspray on your car’s pristine finish can be frustrating, but fear not – it’s often removable with the right techniques and products. This comprehensive guide will walk you through the steps on how to remove overspray from car paint safely and effectively, restoring your vehicle’s shine.
Understanding Overspray and Its Impact
Before diving into the removal process, it’s crucial to understand what overspray is and why it’s problematic. Overspray consists of tiny paint droplets that drift through the air and land on your car’s surface. These droplets bond to the clear coat, creating a rough, textured feel. If left untreated, overspray can dull the paint, making it appear hazy and less vibrant. Furthermore, prolonged exposure to the elements can cause the overspray to become more difficult to remove, potentially leading to permanent damage.
Identifying the Type of Overspray
Identifying the type of overspray is crucial for choosing the appropriate removal method. Common types include:
- Paint Overspray: The most common type, originating from automotive or industrial painting.
- Construction Overspray: Often includes paint, drywall dust, or stucco particles.
- Road Paint Overspray: Typically found near construction zones or recently painted road markings.
The removal method can vary based on the type of overspray encountered. If you’re dealing with construction overspray, the removal will be different than removing road paint overspray.
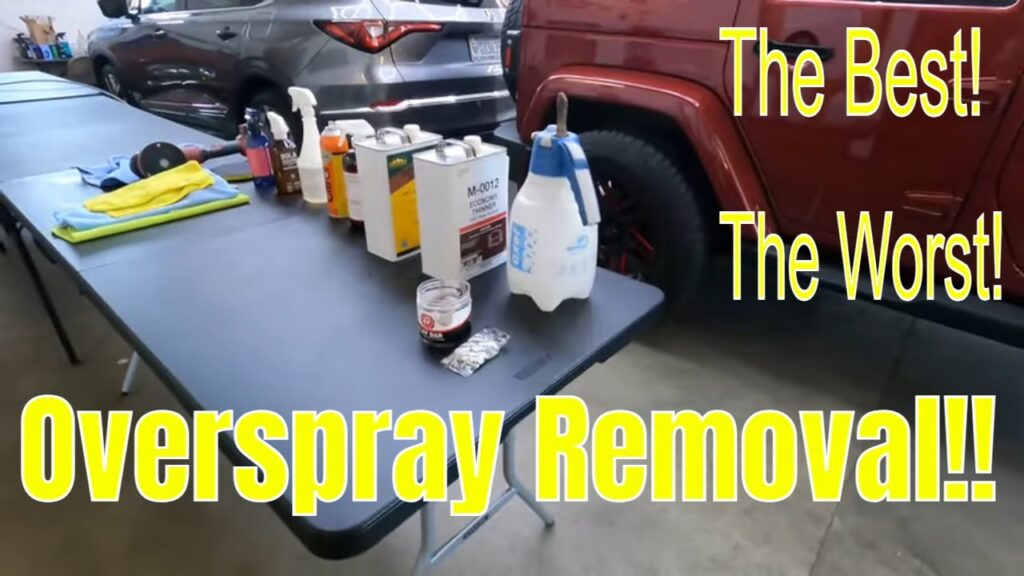
Essential Tools and Materials
Gathering the necessary tools and materials is the first step in how to remove overspray from car paint. Here’s a list of essentials:
- Car Wash Soap: A pH-neutral soap designed for automotive use.
- Microfiber Wash Mitt: For safely washing the car without scratching the paint.
- Two Buckets: One for soapy water and one for rinsing the wash mitt.
- Detailing Clay Bar: A pliable compound that removes bonded contaminants.
- Clay Lubricant: Prevents the clay bar from scratching the paint.
- Microfiber Towels: For drying and buffing.
- Rubbing Compound (Optional): For more stubborn overspray.
- Polishing Compound (Optional): To refine the paint after using rubbing compound.
- Wax or Sealant: To protect the paint after overspray removal.
- Isopropyl Alcohol (IPA): To clean the surface before waxing or sealing.
- Personal Protective Equipment (PPE): Gloves and eye protection.
Step-by-Step Guide to Removing Overspray
Follow these steps carefully to safely and effectively remove overspray from car paint:
Step 1: Wash the Car Thoroughly
Begin by washing your car using the two-bucket method. This removes loose dirt and debris, preventing them from scratching the paint during the claying process. Use a pH-neutral car wash soap and a microfiber wash mitt. Rinse thoroughly.
Step 2: Clay Bar Treatment
The clay bar is your primary weapon against overspray. Knead the clay bar until it’s soft and pliable. Spray the surface with clay lubricant, and gently glide the clay bar back and forth in overlapping motions. You’ll feel the clay bar picking up the overspray particles. Periodically fold and knead the clay bar to expose a clean surface. Continue until the surface feels smooth.
Step 3: Inspect the Surface
After claying, thoroughly inspect the surface. If the overspray is still present, you may need to move on to more aggressive methods. Use a bright light to help identify any remaining overspray.
Step 4: Rubbing Compound (If Necessary)
If the clay bar doesn’t remove all the overspray, you can use a rubbing compound. Apply a small amount of rubbing compound to a microfiber applicator pad. Gently rub the affected area in a circular motion. Be careful not to apply too much pressure, as rubbing compound can be abrasive. Only use this step if the clay bar method failed.
Step 5: Polishing Compound (After Rubbing Compound)
If you used rubbing compound, follow it up with a polishing compound to refine the paint and remove any swirl marks left by the rubbing compound. Apply the polishing compound to a clean microfiber applicator pad and gently buff the area.
Step 6: Final Wash and Dry
Wash the car again to remove any remaining compound residue. Dry the car thoroughly with a clean microfiber towel.
Step 7: Apply Wax or Sealant
Protect your newly cleaned paint with a layer of wax or sealant. This will help prevent future contamination and enhance the shine. Apply the wax or sealant according to the manufacturer’s instructions.
Step 8: IPA Wipe Down
Before applying wax or sealant, it’s a good idea to wipe down the surface with isopropyl alcohol (IPA). This removes any lingering oils or residue, ensuring proper bonding of the wax or sealant.
Alternative Methods for Removing Overspray
While the clay bar method is generally the safest and most effective, there are alternative methods you can consider:
- Overspray Removal Products: Several commercially available products are specifically designed to remove overspray. Follow the manufacturer’s instructions carefully.
- Wet Sanding: This is a more aggressive method that involves using fine-grit sandpaper to remove the overspray. It should only be attempted by experienced detailers, as it can easily damage the paint if done incorrectly.
- Professional Detailing: If you’re uncomfortable attempting the removal yourself, consider hiring a professional detailer. They have the expertise and equipment to safely and effectively remove overspray from car paint.
Preventing Overspray in the Future
Prevention is always better than cure. Here are some tips to help prevent overspray from occurring in the first place:
- Park your car away from construction zones or auto body shops.
- Cover your car when painting nearby objects.
- Communicate with neighbors about upcoming painting projects.
Common Mistakes to Avoid
Avoid these common mistakes when attempting to remove overspray from car paint:
- Using harsh chemicals or abrasive cleaners.
- Applying too much pressure when claying or using rubbing compound.
- Working in direct sunlight.
- Using a dirty clay bar or microfiber towel.
When to Seek Professional Help
If you’re unsure about any of the steps involved in how to remove overspray from car paint, or if the overspray is particularly stubborn, it’s best to seek professional help. A professional detailer has the experience and equipment to safely and effectively remove the overspray without damaging your car’s paint. [See also: Auto Detailing Cost Guide]
Conclusion
Removing overspray from your car’s paint requires patience, the right tools, and a careful approach. By following the steps outlined in this guide, you can restore your car’s shine and protect its finish. Remember to always prioritize safety and avoid aggressive methods that could damage the paint. With a little effort, you can successfully remove overspray from car paint and keep your vehicle looking its best. By following this guide on how to remove overspray from car paint, you can maintain your vehicle’s appearance and value. Remember that prevention is key, so take steps to protect your car from overspray in the future. If you encounter stubborn overspray or are uncomfortable with the process, don’t hesitate to seek professional assistance. [See also: Car Paint Protection Film Installation]
