How to Paint on Wood with Acrylics: A Comprehensive Guide
Acrylic paints are a versatile and popular medium for artists of all levels, and wood provides a unique and beautiful surface to work on. Whether you’re a seasoned painter or just starting, learning how to paint on wood with acrylics can open up a world of creative possibilities. This guide will walk you through the entire process, from preparing the wood to adding the finishing touches, ensuring your artwork stands the test of time.
Why Choose Acrylics for Painting on Wood?
Acrylic paints offer several advantages for wood painting:
- Fast Drying Time: Acrylics dry quickly, allowing you to layer colors and complete projects faster.
- Water-Based and Easy to Clean: Clean-up is a breeze with just soap and water.
- Versatile and Durable: Acrylics adhere well to wood and create a durable, long-lasting finish.
- Vibrant Colors: Acrylics come in a wide range of vibrant colors that can be easily mixed to create custom shades.
- Flexibility: They can be used in various techniques, from thin washes to thick impasto layers.
Materials You’ll Need
Before you start painting on wood with acrylics, gather the following materials:
- Wood Surface: Choose a smooth, untreated wood surface such as plywood, pine, or basswood. Consider the size and shape of your project.
- Acrylic Paints: Select a range of colors that suit your desired artwork. High-quality artist-grade acrylics offer better pigment and longevity.
- Paintbrushes: Invest in a variety of brushes in different sizes and shapes. Synthetic brushes are a good choice for acrylics.
- Primer or Sealer: This is crucial for preparing the wood surface and preventing the paint from soaking in unevenly.
- Palette: A palette for mixing your paints. A disposable palette or a wet palette is ideal.
- Water Container: For cleaning your brushes.
- Paper Towels or Rags: For wiping brushes and cleaning up spills.
- Palette Knife (Optional): For mixing paints and applying thick layers.
- Varnish or Sealer (Optional): To protect your finished artwork.
- Sandpaper (Optional): For smoothing rough wood surfaces.
Preparing the Wood Surface
Proper preparation is key to achieving a professional-looking finish when painting on wood with acrylics. Follow these steps:
Sanding (If Necessary)
If your wood surface is rough, sand it lightly with fine-grit sandpaper (220-grit or higher) to create a smooth surface. This will help the paint adhere better and prevent any texture from showing through.
Cleaning the Wood
Clean the wood surface thoroughly with a damp cloth to remove any dust or debris from sanding. Allow the wood to dry completely before proceeding.
Applying Primer or Sealer
Applying a primer or sealer is an essential step when painting on wood with acrylics. It prevents the wood from absorbing too much paint and creates a smooth, even surface for your artwork. Choose a primer specifically designed for wood, such as gesso or an acrylic-based primer. Apply a thin, even coat of primer using a brush or roller. Allow the primer to dry completely according to the manufacturer’s instructions. You may need to apply two coats of primer for optimal results. Lightly sand the primed surface with fine-grit sandpaper to remove any imperfections.
Painting Techniques for Acrylics on Wood
Now that your wood surface is prepared, it’s time to start painting on wood with acrylics. Here are a few techniques to try:
Base Coating
Apply a base coat of paint to create a uniform background for your artwork. Choose a color that complements your design. Apply the base coat in thin, even layers, allowing each layer to dry completely before applying the next.
Layering
Layering is a technique of building up colors and details by applying thin layers of paint on top of each other. This allows you to create depth, dimension, and subtle variations in color. Allow each layer to dry completely before applying the next.
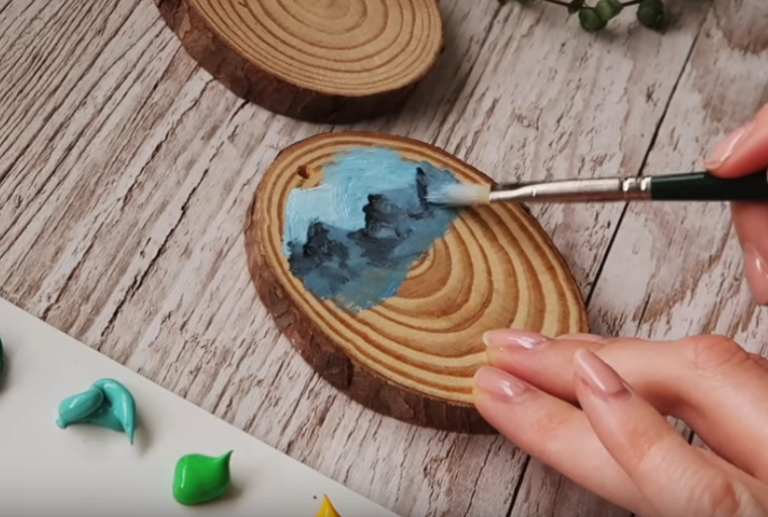
Blending
Blending involves smoothly transitioning between colors to create a seamless gradient. Use a soft brush to blend the colors together while they are still wet. You can also use a blending medium to extend the drying time of the acrylics and make blending easier.
Dry Brushing
Dry brushing is a technique of applying paint with a dry brush to create a textured effect. Dip the brush into the paint and then wipe off most of the paint onto a paper towel. Lightly drag the brush across the surface of the wood to create a broken, textured effect.
Detailing
Use small brushes to add fine details to your artwork. Take your time and work carefully to achieve precise lines and intricate patterns.
Tips for Painting on Wood with Acrylics
Here are some additional tips to help you achieve the best results when painting on wood with acrylics:
- Work in a well-ventilated area: Acrylic paints can release fumes, so it’s important to work in a well-ventilated area.
- Clean your brushes regularly: Clean your brushes with soap and water after each use to prevent the paint from drying and hardening.
- Use a wet palette: A wet palette will keep your acrylic paints moist and prevent them from drying out too quickly.
- Experiment with different techniques: Don’t be afraid to experiment with different techniques to find what works best for you.
- Protect your finished artwork: Apply a coat of varnish or sealer to protect your finished artwork from dust, dirt, and UV damage.
Sealing and Protecting Your Artwork
Once your painting is complete and the acrylics are fully dry, consider sealing it to protect it from damage and enhance its longevity. Here’s how:
Choosing a Sealer
Select a varnish or sealer specifically designed for acrylic paints. Options include gloss, satin, and matte finishes. Gloss varnishes enhance the colors and create a shiny surface, while matte varnishes reduce glare and provide a more subtle look. Satin varnishes offer a balance between the two.
Applying the Sealer
Apply the sealer in thin, even coats using a brush or spray. Allow each coat to dry completely before applying the next. Follow the manufacturer’s instructions for drying times and application techniques.
Multiple Coats
Applying multiple coats of sealer will provide better protection for your artwork. Two to three coats are typically recommended.
Troubleshooting Common Issues
Even with careful preparation, you might encounter some common issues when painting on wood with acrylics. Here’s how to address them:
- Paint Cracking: This can occur if the paint is applied too thickly or if the wood is not properly sealed. To prevent cracking, apply thin layers of paint and ensure the wood is adequately primed.
- Uneven Coverage: This can happen if the wood surface is not smooth or if the paint is too thin. Sand the wood surface before painting and apply multiple coats of paint for even coverage.
- Paint Beading: This occurs when the paint doesn’t adhere properly to the wood surface. Clean the wood surface thoroughly and apply a primer or sealer to improve adhesion.
Acrylic Painting Ideas for Wood
Need some inspiration? Here are a few acrylic painting ideas for wood:
- Wood Slice Ornaments: Paint festive designs on wood slices to create unique Christmas ornaments.
- Wooden Signs: Create personalized wooden signs with inspirational quotes or family names.
- Abstract Art: Experiment with abstract designs and colors on wood panels.
- Landscape Paintings: Capture the beauty of nature with landscape paintings on wood canvases.
- Portraits: Paint portraits of your loved ones or favorite celebrities on wood.
Mastering how to paint on wood with acrylics requires practice and patience. By following these steps and experimenting with different techniques, you can create stunning works of art that showcase the natural beauty of wood and the vibrant colors of acrylics. Remember to properly prepare your surface, choose the right materials, and protect your finished artwork for long-lasting enjoyment. Happy painting!
[See also: Acrylic Painting Techniques for Beginners]
[See also: Best Wood Types for Painting]
[See also: How to Seal Acrylic Paintings]
