How to Clean Carburetor on Motorcycle: A Step-by-Step Guide
Maintaining a motorcycle is crucial for its longevity and performance. One of the most important maintenance tasks is cleaning the carburetor. A clean carburetor ensures optimal fuel delivery, smooth idling, and efficient engine performance. Over time, carburetors can become clogged with dirt, varnish, and fuel residue, leading to poor performance or even complete engine failure. This article provides a comprehensive, step-by-step guide on how to clean carburetor on motorcycle, ensuring your bike runs smoothly.
Why Clean Your Motorcycle Carburetor?
Before diving into the cleaning process, it’s essential to understand why cleaning your motorcycle’s carburetor is necessary. The carburetor mixes air and fuel to create the perfect combustion mixture. When it becomes dirty, this mixture is disrupted, leading to several issues:
- Poor Engine Performance: A dirty carburetor can cause sluggish acceleration and reduced power.
- Difficult Starting: Starting your motorcycle can become challenging, especially in cold weather.
- Rough Idling: The engine may idle unevenly or stall frequently.
- Reduced Fuel Efficiency: A clogged carburetor can lead to increased fuel consumption.
- Engine Damage: In severe cases, a malfunctioning carburetor can cause engine damage.
Tools and Materials Needed
Before you begin, gather all the necessary tools and materials. Having everything ready will make the cleaning process smoother and more efficient. Here’s what you’ll need:
- Socket Set and Wrenches: For removing and disassembling the carburetor.
- Screwdrivers: Both Phillips head and flathead screwdrivers will be useful.
- Carburetor Cleaner: A specialized cleaner designed to dissolve fuel residue and varnish.
- Compressed Air: For blowing out small passages and jets.
- Soft Brush: For gently scrubbing away dirt and grime.
- Carburetor Cleaning Wire Set: Small wires for cleaning jets and passages.
- Clean Rags: For wiping down parts and surfaces.
- Safety Glasses: To protect your eyes from cleaner and debris.
- Gloves: To protect your hands from chemicals and dirt.
- Parts Tray: To keep track of small parts and prevent loss.
- Service Manual (Optional): Provides specific instructions for your motorcycle model.
Step-by-Step Guide: How to Clean Carburetor on Motorcycle
Step 1: Prepare Your Motorcycle
Start by preparing your motorcycle for the cleaning process. Ensure the engine is cool to prevent burns. Disconnect the fuel line from the carburetor and drain any remaining fuel. It’s also a good idea to disconnect the battery to prevent accidental starting. Work in a well-ventilated area to avoid inhaling harmful fumes.
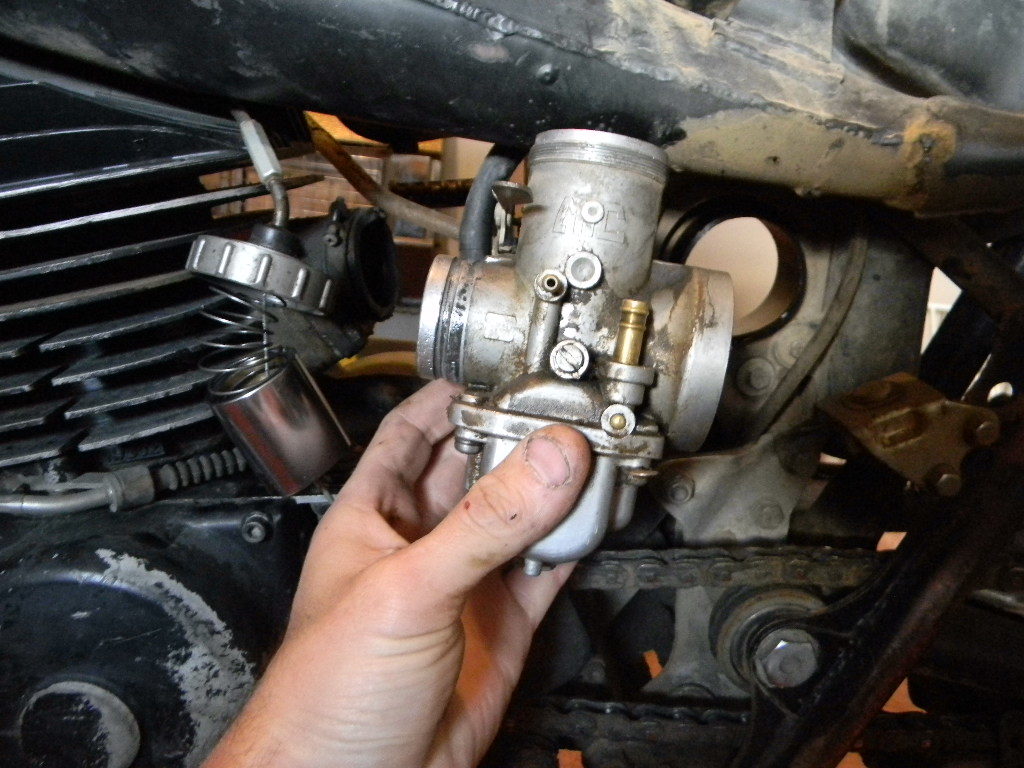
Step 2: Remove the Carburetor
Locate the carburetor on your motorcycle. It’s usually situated between the air filter and the engine. Carefully disconnect all cables, hoses, and linkages attached to the carburetor. Use the appropriate wrenches and screwdrivers to loosen and remove the mounting bolts. Be gentle to avoid damaging any components. Once everything is disconnected, carefully remove the carburetor from the motorcycle.
Step 3: Disassemble the Carburetor
With the carburetor removed, place it on a clean work surface. Refer to your motorcycle’s service manual for specific disassembly instructions. Generally, you’ll need to remove the float bowl, jets, needles, and other small parts. Use the appropriate screwdrivers and wrenches to loosen and remove these components. Keep track of each part and its location to ensure proper reassembly. A parts tray can be very helpful for this.
Step 4: Clean the Carburetor Components
Now comes the crucial part: cleaning the carburetor components. Start by spraying all parts with carburetor cleaner. Allow the cleaner to soak for several minutes to dissolve any fuel residue and varnish. Use the soft brush to scrub away any stubborn dirt or grime. Pay close attention to the jets and small passages, as these are prone to clogging. Use the carburetor cleaning wire set to carefully clean out any blockages in the jets. Be gentle to avoid damaging the delicate components.
Step 5: Clean the Carburetor Body
Don’t forget to clean the carburetor body itself. Spray it thoroughly with carburetor cleaner and use the soft brush to scrub away any dirt or grime. Pay attention to the internal passages and openings. Use compressed air to blow out any remaining cleaner and debris. Ensure all passages are clear and free of obstructions. A clean carburetor body is essential for optimal performance.
Step 6: Reassemble the Carburetor
Once all the components are clean and dry, it’s time to reassemble the carburetor. Refer to your motorcycle’s service manual for specific reassembly instructions. Carefully reinstall all jets, needles, and other small parts in their original locations. Ensure all screws and bolts are tightened securely but not overtightened. Double-check your work to ensure everything is properly assembled. A properly reassembled carburetor is crucial for smooth engine operation.
Step 7: Reinstall the Carburetor
With the carburetor reassembled, carefully reinstall it on your motorcycle. Reconnect all cables, hoses, and linkages. Tighten the mounting bolts securely. Reconnect the fuel line and the battery. Double-check all connections to ensure they are secure and properly installed. Proper installation is essential for safe and reliable operation.
Step 8: Test and Adjust
After reinstalling the carburetor, it’s time to test and adjust it. Start your motorcycle and let it idle. Listen for any unusual noises or rough idling. Adjust the idle speed screw to achieve a smooth and stable idle. If necessary, adjust the air/fuel mixture screw to optimize engine performance. Refer to your motorcycle’s service manual for specific adjustment instructions. A properly adjusted carburetor ensures optimal engine performance and fuel efficiency.
Tips for Maintaining a Clean Carburetor
To prevent future carburetor problems, consider these maintenance tips:
- Use Fuel Stabilizer: Add fuel stabilizer to your fuel tank, especially when storing your motorcycle for extended periods.
- Regularly Inspect Fuel Lines: Check fuel lines for cracks or leaks and replace them as needed.
- Clean Air Filter: A clean air filter prevents dirt and debris from entering the carburetor.
- Avoid Ethanol Fuels: Ethanol can damage carburetor components; use ethanol-free fuel if possible.
- Routine Carburetor Cleaning: Schedule regular carburetor cleanings as part of your motorcycle maintenance routine.
Troubleshooting Common Carburetor Problems
Even after cleaning, you might encounter some common carburetor problems. Here are a few troubleshooting tips:
- Engine Still Runs Rough: Double-check all carburetor components and settings.
- Fuel Leaks: Inspect fuel lines and connections for leaks.
- Difficulty Starting: Check the spark plug and ignition system.
- Poor Acceleration: Adjust the air/fuel mixture screw.
- Engine Stalling: Adjust the idle speed screw.
When to Seek Professional Help
If you’re not comfortable cleaning your motorcycle’s carburetor yourself, or if you’ve tried cleaning it and are still experiencing problems, it’s best to seek professional help. A qualified mechanic can diagnose and repair any issues with your carburetor, ensuring your motorcycle runs smoothly. Knowing how to clean carburetor on motorcycle is great, but knowing your limits is even better. [See also: Motorcycle Maintenance Checklist] [See also: Common Motorcycle Problems]
Conclusion
Cleaning your motorcycle’s carburetor is a crucial maintenance task that can significantly improve engine performance and fuel efficiency. By following this step-by-step guide, you can learn how to clean carburetor on motorcycle effectively and safely. Remember to gather all the necessary tools and materials, work in a well-ventilated area, and refer to your motorcycle’s service manual for specific instructions. Regular carburetor cleaning and maintenance will help keep your motorcycle running smoothly for years to come. The process of how to clean carburetor on motorcycle is not overly complicated, but it does require patience and attention to detail. Taking the time to properly clean carburetor on motorcycle will save you time and money in the long run. Ignoring the need to clean carburetor on motorcycle can lead to more serious and costly repairs. Therefore, understanding how to clean carburetor on motorcycle and performing this maintenance regularly is an investment in your motorcycle’s longevity and performance. When you clean carburetor on motorcycle, you’re ensuring optimal fuel delivery, smooth idling, and efficient engine performance. If you follow this guide on how to clean carburetor on motorcycle, you will be pleased with the results. Next time you need to clean carburetor on motorcycle, refer back to this article for detailed instructions. Understanding how to clean carburetor on motorcycle empowers you to take control of your motorcycle’s maintenance. The knowledge of how to clean carburetor on motorcycle is a valuable skill for any motorcycle owner. Don’t underestimate the importance of knowing how to clean carburetor on motorcycle for maintaining your bike’s peak performance. Taking the initiative to clean carburetor on motorcycle yourself can save you a significant amount of money on mechanic fees. Learning how to clean carburetor on motorcycle is a worthwhile investment for any motorcycle enthusiast.
