
Extend Concrete Patio: A Comprehensive Guide to Expanding Your Outdoor Living Space
Expanding your outdoor living space is a fantastic way to enhance your home’s value and enjoyment. One of the most popular methods for achieving this is to extend concrete patio. Whether you’re planning to host larger gatherings, create a dedicated outdoor dining area, or simply want more room to relax, extending your existing concrete patio can provide the extra space you need. This comprehensive guide will walk you through the entire process, from planning and preparation to pouring and finishing the concrete. We’ll cover everything you need to know to successfully extend concrete patio, ensuring a durable and aesthetically pleasing result. Understanding the steps involved in how to extend concrete patio is crucial for a successful project.
Planning and Preparation
Before you even think about mixing concrete, careful planning and preparation are essential. This stage sets the foundation for a successful project. Here’s what you need to consider:
Assess Your Existing Patio
Start by thoroughly inspecting your existing concrete patio. Look for cracks, uneven surfaces, or other signs of damage. Addressing these issues before you extend concrete patio will ensure a seamless and structurally sound addition. Consider the overall condition and whether any repairs are necessary.
Determine the Size and Shape
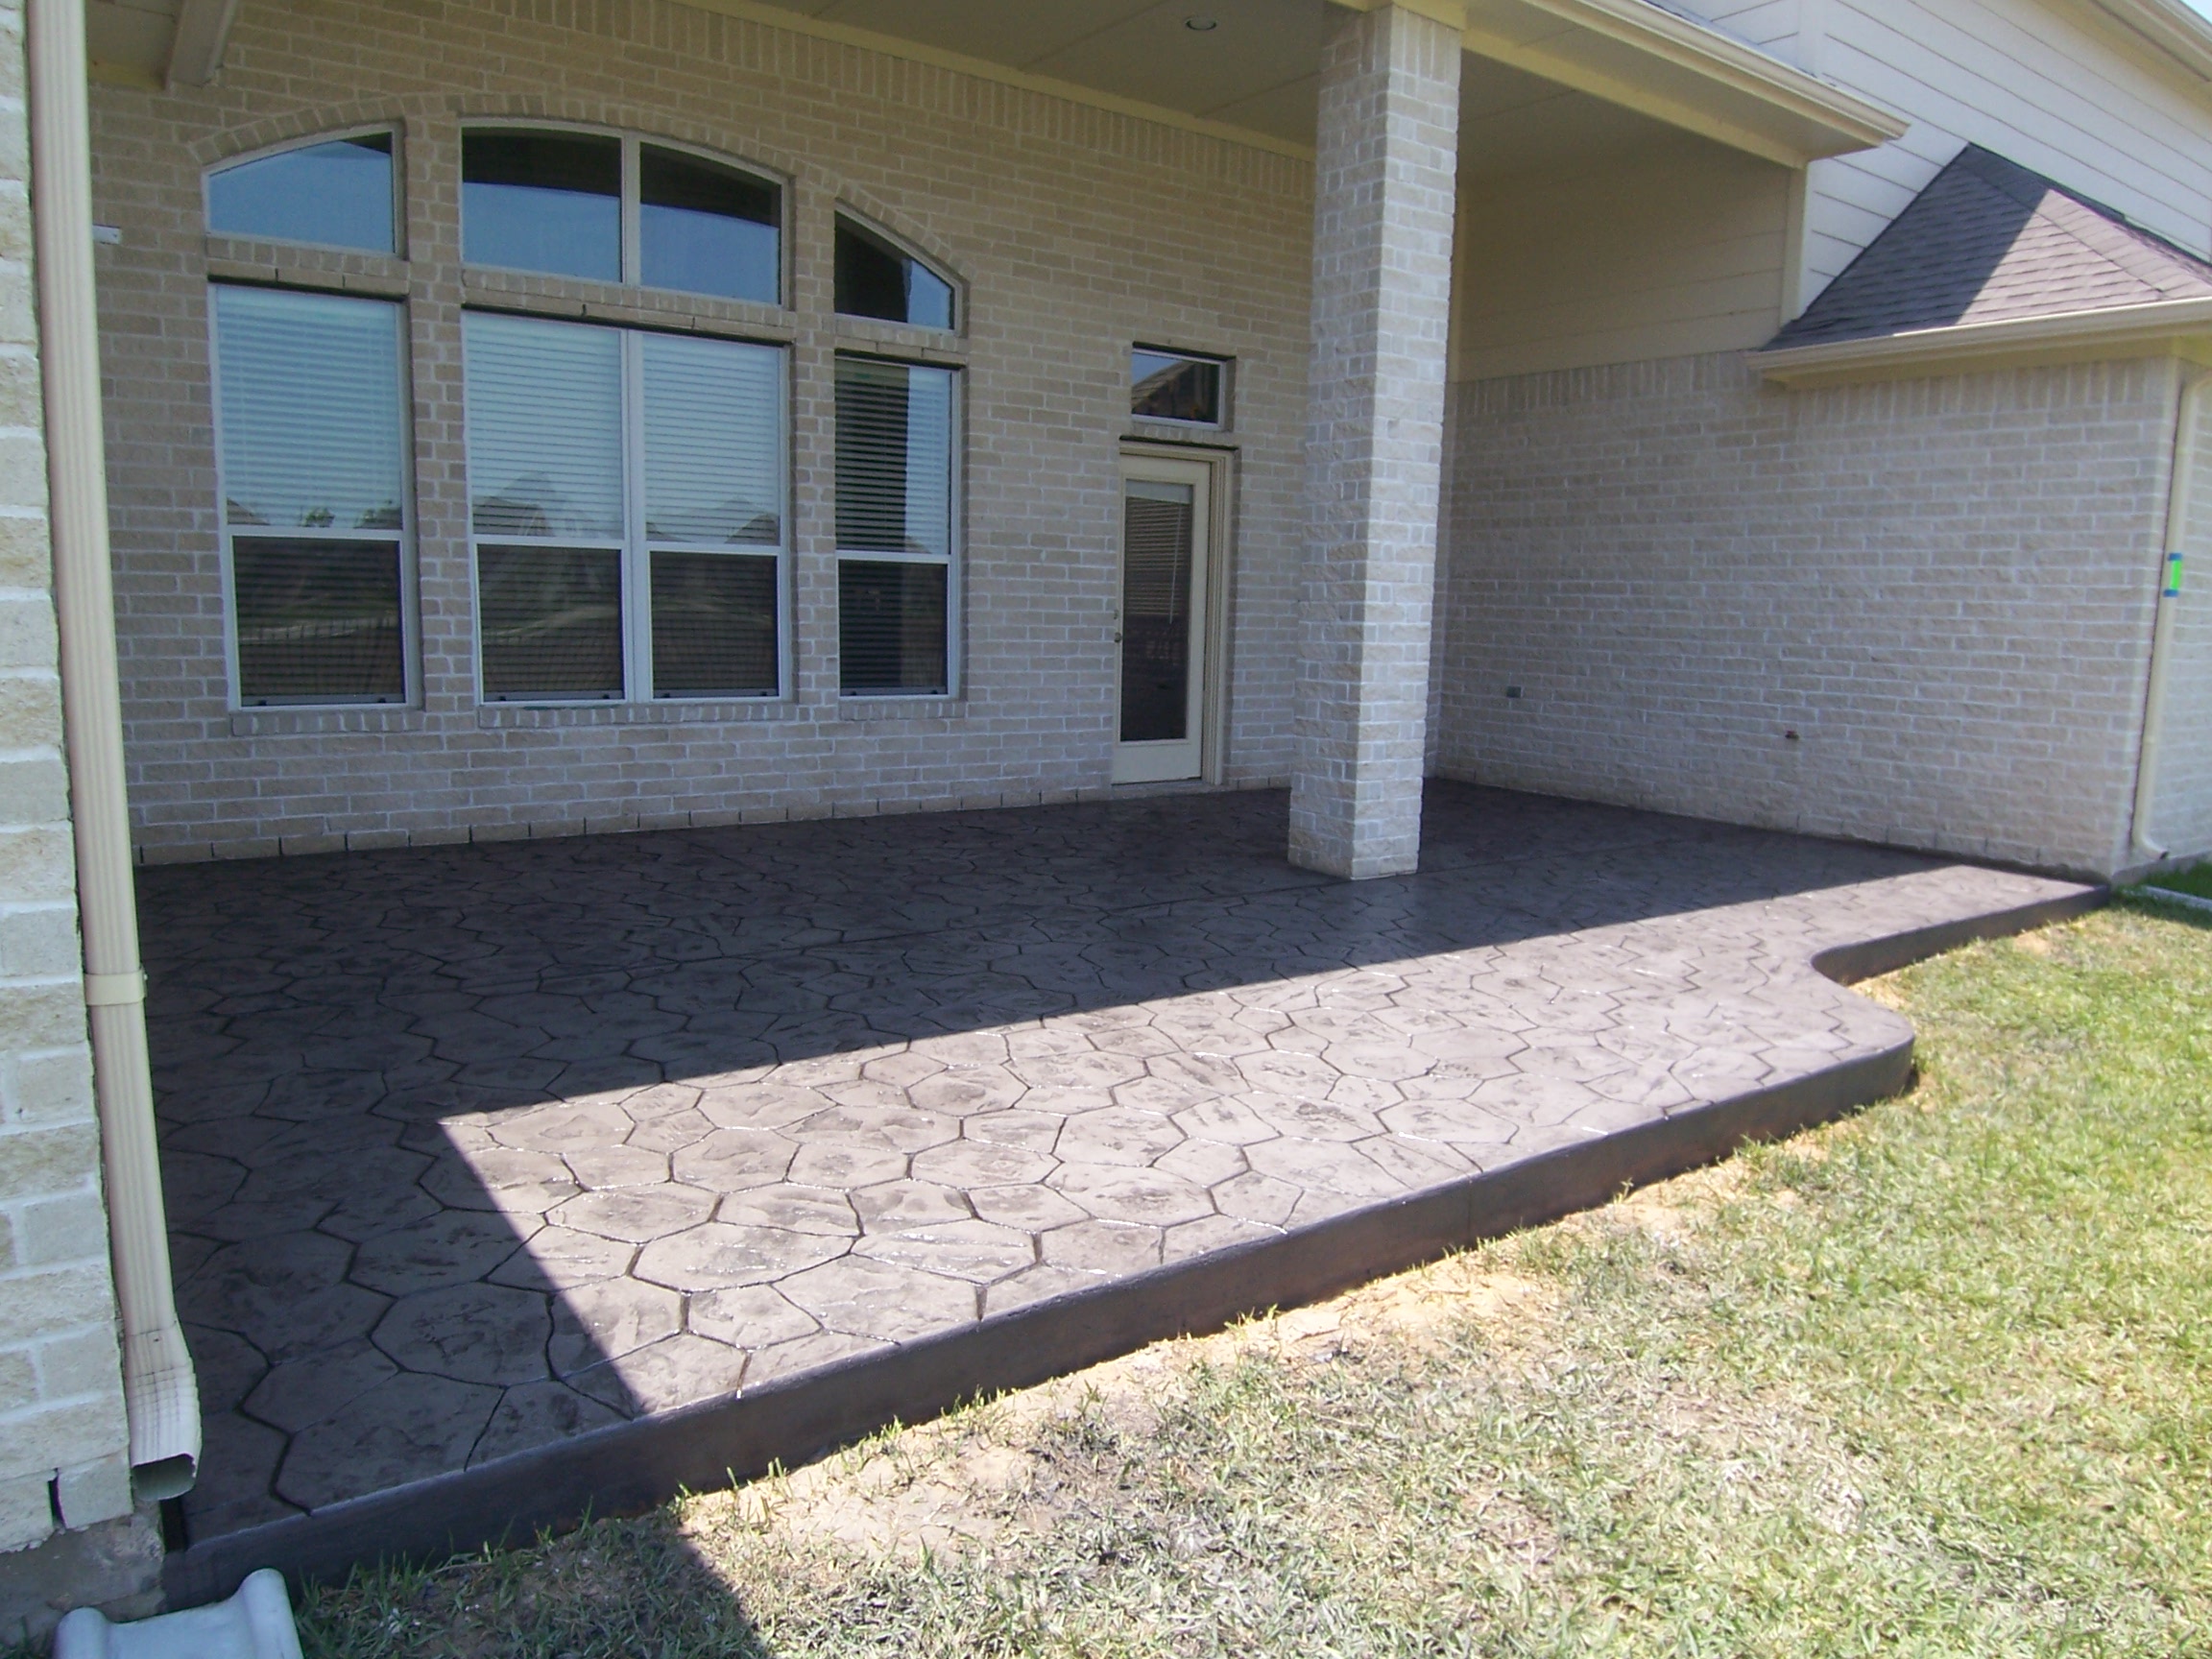
Decide how much larger you want your patio to be and what shape it should take. Consider the available space in your yard, your budget, and your aesthetic preferences. A well-defined plan will prevent costly mistakes later on. Think about how you intend to use the extended patio. Will it be for dining, lounging, or a combination of both? This will influence the size and layout.
Check Local Building Codes and Permits
Before you begin any construction, check with your local building department to determine if you need a permit. Regulations vary depending on your location, and failing to obtain the necessary permits can result in fines or delays. Research local zoning laws to ensure your planned extension complies with all requirements. Typically, extending a concrete patio requires a permit if it exceeds a certain square footage or alters drainage patterns. Ignoring these regulations can lead to significant headaches down the road. Understanding local codes is vital when you extend concrete patio.
Gather Your Tools and Materials
Having the right tools and materials on hand will make the job much easier. Here’s a list of essentials:
- Shovels
- Wheelbarrow
- Measuring tape
- String and stakes
- Level
- Concrete mixer (optional, but highly recommended for larger projects)
- Concrete float
- Concrete edger
- Concrete groover
- Trowel
- Safety glasses
- Gloves
- Concrete mix
- Gravel base
- Form boards (2x4s or 2x6s)
- Rebar or wire mesh
- Concrete sealer
Preparing the Ground
Proper ground preparation is crucial for the longevity and stability of your extended patio. Follow these steps carefully:
Excavation
Dig out the area where you plan to extend concrete patio. The depth of excavation will depend on the thickness of the concrete and the gravel base. A general rule of thumb is to excavate 6-8 inches deep. Remove any topsoil, grass, or other organic material. Accurate excavation ensures the concrete will be level and properly supported. This step is critical when you extend concrete patio.
Compacting the Soil
Once you’ve excavated the area, compact the soil using a hand tamper or a plate compactor. This will create a solid base for the gravel. Compacting the soil prevents settling and cracking in the concrete later on. A stable base is essential to extend concrete patio successfully.
Adding the Gravel Base
Pour a layer of gravel into the excavated area, typically 4-6 inches thick. Spread the gravel evenly and compact it thoroughly. The gravel base provides drainage and helps prevent the concrete from cracking due to frost heave. Using the correct gravel base is important when you extend concrete patio.
Setting the Forms
Use form boards (2x4s or 2x6s) to create the perimeter of your extended patio. Ensure the forms are level and securely staked in place. The forms will hold the concrete in place while it cures. Precise formwork is essential for a professional-looking finish. Properly setting the forms is key to extend concrete patio with a clean edge.
Pouring the Concrete
Now comes the exciting part: pouring the concrete. This step requires careful attention to detail and a bit of muscle.
Mixing the Concrete
You can either mix the concrete yourself using a concrete mixer or purchase pre-mixed concrete from a local supplier. If you’re mixing it yourself, follow the manufacturer’s instructions carefully. Use the correct ratio of water to concrete mix to achieve the desired consistency. Avoid adding too much water, as this can weaken the concrete. If you’re unsure, it’s often best to opt for pre-mixed concrete to ensure consistent quality. Proper mixing is important when you extend concrete patio.
Reinforcing the Concrete
Before pouring the concrete, add rebar or wire mesh to the forms. This will reinforce the concrete and help prevent cracking. Space the rebar or wire mesh evenly throughout the area. Reinforcement is particularly important if you live in an area with freeze-thaw cycles. Reinforcing helps when you extend concrete patio to ensure longevity.
Pouring and Spreading the Concrete
Pour the concrete into the forms, starting at one end and working your way to the other. Use a shovel to spread the concrete evenly and fill all the corners. Avoid pouring too much concrete in one spot, as this can create uneven surfaces. A consistent pour is crucial for a smooth finish. It’s important to pour carefully when you extend concrete patio.
Screeding the Concrete
Use a screed board to level the concrete surface. A screed board is a long, straight board that you drag across the top of the forms. This will remove any excess concrete and create a smooth, even surface. Screeding is a critical step in achieving a professional-looking finish. Screeding ensures a level surface to extend concrete patio.
Finishing the Concrete
Finishing the concrete is where you add the final touches and create the desired texture.
Floating the Concrete
Once the concrete has bled off any excess water, use a concrete float to smooth the surface. A float is a flat, rectangular tool that you use to work the surface of the concrete. Floating helps to remove any imperfections and create a smooth, uniform texture. Floating is important to extend concrete patio with a smooth finish.
Edging and Grooving the Concrete
Use a concrete edger to round the edges of the patio. This will prevent chipping and create a more polished look. Use a concrete groover to create control joints in the concrete. Control joints help to prevent cracking by providing a place for the concrete to expand and contract. Edging and grooving are essential for durability when you extend concrete patio.
Troweling the Concrete
If you want a smooth, polished finish, use a trowel to further smooth the surface of the concrete. A trowel is a flat, rectangular tool that you use to create a smooth, hard surface. Troweling requires some skill and practice, so it’s best to start with a small area. Troweling adds a professional touch to extend concrete patio.
Adding a Texture
You can add texture to the concrete by using a variety of tools and techniques. Some popular options include:
- Broom finish: Drag a broom across the surface of the concrete to create a textured, non-slip finish.
- Stamped concrete: Use stamps to create patterns and designs in the concrete.
- Exposed aggregate: Wash away the top layer of concrete to expose the aggregate underneath.
Choosing the right texture can enhance the appearance and functionality of your patio. Adding texture can customize your extend concrete patio project.
Curing and Sealing the Concrete
Curing and sealing are essential for protecting your new concrete patio and ensuring its longevity.
Curing the Concrete
Curing is the process of keeping the concrete moist while it hardens. This helps to prevent cracking and ensures that the concrete reaches its full strength. You can cure concrete by:
- Spraying it with water regularly
- Covering it with plastic sheeting
- Applying a curing compound
Cure the concrete for at least 7 days, or longer if possible. Proper curing is crucial to extend concrete patio and ensure its durability.
Sealing the Concrete
Once the concrete has fully cured, apply a concrete sealer. A sealer will protect the concrete from stains, water damage, and other environmental factors. Choose a sealer that is appropriate for your climate and the type of concrete you used. Sealing prolongs the life of your extend concrete patio project.
Enjoying Your Extended Patio
Congratulations! You’ve successfully extended your concrete patio. Now it’s time to enjoy your new outdoor living space. Add some comfortable furniture, a grill, and some plants to create a welcoming and functional area. With proper care and maintenance, your extended patio will provide years of enjoyment. Remember to keep your patio clean and reseal it every few years to maintain its appearance and protect it from the elements. You’ve expanded your living space when you extend concrete patio.
Extending your concrete patio is a rewarding project that can significantly enhance your home’s value and appeal. By following these steps carefully, you can achieve a beautiful and durable outdoor living space that you’ll enjoy for years to come. Remember, planning, preparation, and attention to detail are key to success. With a little effort, you can transform your backyard into an inviting oasis. Consider the long-term benefits when you extend concrete patio. [See also: Concrete Patio Maintenance Tips] [See also: Designing Your Outdoor Living Space]
