Build Your Own Acrylic Fish Tank: A Comprehensive Guide
For aquarium enthusiasts seeking a unique and personalized aquatic display, the prospect of building your own acrylic fish tank can be incredibly rewarding. Beyond the cost savings compared to purchasing a pre-made tank, constructing your own allows for complete customization in terms of size, shape, and features. This comprehensive guide will walk you through the entire process, from planning and material selection to assembly and leak testing. Whether you’re a seasoned DIYer or a beginner, this article provides the necessary information to successfully build your own acrylic fish tank.
Why Choose Acrylic Over Glass?
Before diving into the building process, it’s important to understand the advantages of acrylic over traditional glass aquariums. Acrylic boasts several key benefits:
- Strength and Durability: Acrylic is significantly stronger and more impact-resistant than glass. This reduces the risk of cracking or shattering, especially in larger tanks.
- Clarity: High-quality acrylic offers superior optical clarity compared to glass, allowing for a more vibrant and unobstructed view of your aquatic inhabitants.
- Weight: Acrylic is considerably lighter than glass, making it easier to handle during construction and relocation.
- Design Flexibility: Acrylic can be easily cut, drilled, and shaped, enabling you to create custom designs that are impossible to achieve with glass.
- Repairability: Minor scratches and imperfections in acrylic can often be buffed out, whereas glass scratches are permanent.
Planning and Design
Careful planning is crucial for a successful build your own acrylic fish tank project. Consider the following factors:
Tank Size and Dimensions
Determine the desired size of your aquarium based on the type and number of fish you plan to keep. Research the specific space requirements of your chosen species. Larger tanks generally offer more stability and are less prone to fluctuations in water parameters. Calculate the dimensions carefully, considering the thickness of the acrylic sheets you’ll be using.
Tank Shape and Style
While rectangular tanks are the most common and easiest to construct, acrylic allows for more creative designs. Consider cylindrical, corner, or even custom-shaped aquariums. Keep in mind that complex shapes may require more advanced cutting and bonding techniques.
Filtration and Equipment
Plan for the placement of your filtration system, heater, lighting, and other necessary equipment. Decide whether you’ll be using an internal or external filter, and ensure you have adequate space and access for maintenance. Consider incorporating a sump into your design for added filtration capacity and stability.
Acrylic Thickness Calculation
Determining the correct acrylic thickness is paramount for the structural integrity of your tank. Several online calculators and charts can help you calculate the required thickness based on the tank’s dimensions and water volume. Overestimating the thickness is always preferable to underestimating. Using too thin of an acrylic sheet can result in catastrophic failure of your tank, so always err on the side of caution. A good rule of thumb is to consult with an experienced aquarium builder or acrylic supplier for guidance.
Materials and Tools
Gather all the necessary materials and tools before you begin construction. Here’s a comprehensive list:
- Acrylic Sheets: Purchase high-quality, cell-cast acrylic sheets of the appropriate thickness. Ensure the acrylic is aquarium-safe and free from contaminants.
- Acrylic Cement: Use a specialized acrylic cement that chemically bonds the acrylic sheets together. Weld-On 4 is a popular choice for thinner acrylic, while Weld-On 16 is suitable for thicker sheets.
- Applicator Bottles: These bottles allow for precise application of the acrylic cement.
- Clamps: Use clamps to hold the acrylic sheets securely in place while the cement cures.
- Sandpaper: Various grits of sandpaper (e.g., 220, 400, 600) are needed for smoothing edges and removing imperfections.
- Buffing Compound: A buffing compound and polishing wheel will help restore the clarity of the acrylic after sanding.
- Measuring Tools: A ruler, tape measure, and square are essential for accurate cutting and alignment.
- Cutting Tools: A table saw with a fine-tooth blade, a router, or a scoring knife can be used to cut the acrylic sheets.
- Safety Gear: Wear safety glasses, gloves, and a respirator when working with acrylic cement and power tools.
Step-by-Step Construction Process
Follow these steps to build your own acrylic fish tank:
Cutting the Acrylic Sheets
Carefully measure and mark the acrylic sheets according to your design. Use a table saw or router with a sharp blade to cut the sheets to the desired dimensions. Ensure the cuts are clean and straight. Alternatively, you can have the acrylic professionally cut to size by the supplier.
Preparing the Edges
Smooth the edges of the acrylic sheets using sandpaper. Start with a coarser grit (e.g., 220) to remove any rough edges, and then gradually move to finer grits (e.g., 400, 600) to create a smooth, even surface. This will ensure a strong and seamless bond.
Assembling the Tank
Position the bottom panel of the tank on a flat, stable surface. Apply acrylic cement to the edges of the bottom panel and the edges of the side panels. Carefully align the side panels with the bottom panel and clamp them securely in place. Ensure the seams are tight and even. Repeat this process for the remaining side panels and the top panel (if applicable). Allow the cement to cure completely according to the manufacturer’s instructions. This is a critical step in the build your own acrylic fish tank process.
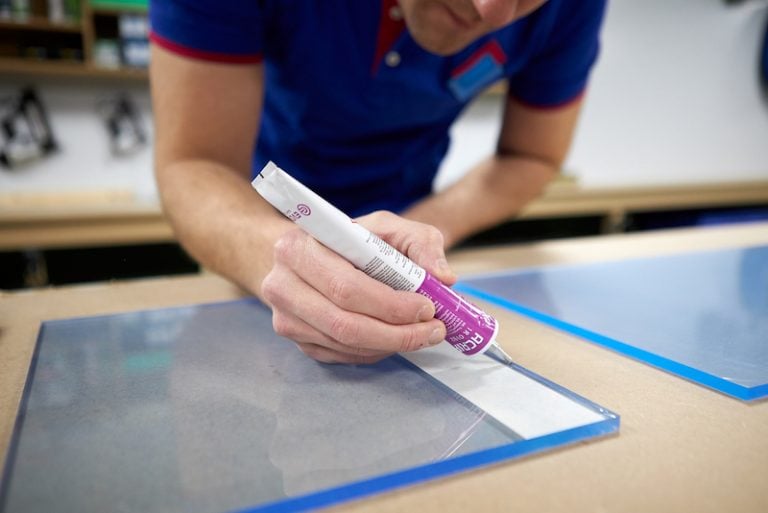
Applying Acrylic Cement
Using the applicator bottle, carefully apply acrylic cement to the joints between the panels. The cement will wick into the joint and create a strong chemical bond. Apply enough cement to fill the joint completely, but avoid over-applying, as this can cause the acrylic to become cloudy. Wipe away any excess cement immediately with a clean cloth.
Curing Time
Allow the acrylic cement to cure completely before proceeding to the next step. The curing time will vary depending on the type of cement used and the thickness of the acrylic. Refer to the manufacturer’s instructions for specific curing times. Generally, it’s best to wait at least 24-48 hours for the cement to fully cure. Rushing this step can compromise the structural integrity of your tank.
Sealing the Seams
After the cement has cured, apply a bead of aquarium-safe silicone sealant to the inside seams of the tank. This will provide an extra layer of protection against leaks. Smooth the sealant with your finger or a tool to create a clean, even finish. Let the sealant cure completely before filling the tank with water.
Buffing and Polishing
Once the tank is fully assembled and sealed, use a buffing compound and polishing wheel to restore the clarity of the acrylic. This will remove any scratches or imperfections and leave the acrylic looking crystal clear. Be careful not to overheat the acrylic during the buffing process, as this can cause it to warp or melt.
Leak Testing
Before introducing any fish or plants, it’s essential to leak test your new build your own acrylic fish tank. Fill the tank with water and monitor it closely for any leaks. Check all the seams and joints for signs of water seepage. If you detect any leaks, drain the tank and repair the affected area with additional acrylic cement and silicone sealant. Allow the repairs to cure completely before retesting.
Finishing Touches
Once you’re confident that your tank is leak-free, you can add the finishing touches. Install your filtration system, heater, and lighting. Add substrate, rocks, plants, and other decorations to create a suitable environment for your fish. Cycle the tank properly before introducing any livestock. [See also: Aquarium Cycling Guide]
Tips for Success
- Practice on Scrap Acrylic: Before working on your actual tank, practice cutting, bonding, and polishing acrylic on scrap pieces. This will help you develop your skills and avoid costly mistakes.
- Work in a Well-Ventilated Area: Acrylic cement fumes can be harmful, so work in a well-ventilated area and wear a respirator.
- Keep Acrylic Clean: Clean the acrylic sheets thoroughly before bonding to remove any dust, dirt, or grease.
- Use the Right Cement: Choose the appropriate acrylic cement for the thickness of your acrylic sheets.
- Take Your Time: Building an acrylic fish tank is a time-consuming process, so don’t rush it. Take your time and pay attention to detail to ensure a successful outcome.
Troubleshooting
Even with careful planning and execution, problems can arise during the construction process. Here are some common issues and how to address them:
- Leaks: Leaks are the most common problem encountered when building an acrylic fish tank. If you experience leaks, drain the tank and identify the source of the leak. Apply additional acrylic cement and silicone sealant to the affected area and allow it to cure completely before retesting.
- Cloudy Acrylic: Cloudy acrylic can be caused by over-application of acrylic cement or by using the wrong type of cement. If your acrylic becomes cloudy, try buffing it with a polishing compound. If the cloudiness persists, you may need to replace the affected panel.
- Cracks: Cracks can occur if the acrylic is stressed or if the cement is not properly applied. If you discover a crack, stop construction immediately and assess the damage. Small cracks can sometimes be repaired with acrylic cement, but larger cracks may require replacing the entire panel.
Conclusion
Building your own acrylic fish tank can be a challenging but rewarding experience. By following the steps outlined in this guide and taking the necessary precautions, you can create a custom aquarium that perfectly meets your needs and preferences. Remember to prioritize safety, accuracy, and patience throughout the process. The result will be a stunning and unique aquatic display that you can be proud of. Don’t hesitate to research further and consult with experienced aquarium builders if you encounter any difficulties. The ability to build your own acrylic fish tank offers incredible customization and a deep sense of accomplishment.
