Acrylic Paint Nails: A Comprehensive Guide to DIY Nail Art
Acrylic paint nails have surged in popularity, offering a versatile and affordable alternative to traditional nail polish. This guide provides a comprehensive overview of how to create stunning nail art using acrylic paints, covering everything from essential supplies to advanced techniques. Whether you’re a beginner looking to experiment or an experienced nail artist seeking new methods, mastering acrylic paint nails can unlock a world of creative possibilities.
Why Choose Acrylic Paint for Nail Art?
Several factors contribute to the appeal of acrylic paint nails:
- Versatility: Acrylic paints can be used for intricate designs, gradients, and even full nail coverage.
- Cost-Effectiveness: Compared to specialized nail art products, acrylic paints are relatively inexpensive and readily available.
- Ease of Correction: Mistakes are easily rectified with a damp brush before the paint dries.
- Customization: Acrylic paints can be mixed to create unique colors and shades.
Essential Supplies for Acrylic Paint Nails
Before embarking on your acrylic paint nails journey, gather the following supplies:
- Acrylic Paints: Opt for a set of high-quality acrylic paints in a variety of colors. Look for paints specifically designed for art, as they tend to have finer pigments.
- Nail Polish Base Coat: Protects your natural nails and provides a smooth surface for the acrylic paint.
- Nail Polish Top Coat: Seals the design and adds shine, ensuring longevity.
- Assorted Paintbrushes: A range of brush sizes, including fine detail brushes, flat brushes, and angled brushes, is essential for creating different effects.
- Water Container: For cleaning your brushes.
- Palette or Mixing Surface: A plastic palette or ceramic tile works well for mixing colors.
- Paper Towels or Cotton Pads: For cleaning brushes and wiping up spills.
- Nail Art Dotting Tools (Optional): Useful for creating dots and other intricate patterns.
- Orange Wood Sticks or Toothpicks: For precise application and corrections.
Preparing Your Nails for Acrylic Paint
Proper preparation is crucial for achieving a long-lasting and professional-looking acrylic paint nails manicure:
- Cleanse Your Nails: Remove any existing nail polish and wash your hands thoroughly with soap and water.
- Shape Your Nails: File your nails to your desired shape.
- Buff Your Nails: Gently buff the surface of your nails to create a smooth canvas.
- Apply Base Coat: Apply a thin, even layer of base coat and allow it to dry completely.
Basic Techniques for Acrylic Paint Nails
Once your nails are prepped, you can start experimenting with basic acrylic paint nails techniques:
Creating Simple Designs
Start with simple designs such as dots, stripes, or geometric shapes. Use a fine detail brush or a dotting tool to apply the paint to your nails. Remember to use thin layers and allow each layer to dry before applying the next.
Color Blending and Gradients
Acrylic paint nails are excellent for creating color blends and gradients. Apply two or more colors to your palette, then use a flat brush to blend them together. Apply the blended colors to your nails in thin layers, gradually building up the desired effect.
Using Stencils and Stamps
Stencils and stamps can be used to create more complex designs. Apply the stencil or stamp to your nail, then use a sponge or brush to apply the acrylic paint. Carefully remove the stencil or stamp to reveal the design. [See also: Nail Stamping Techniques]
Advanced Acrylic Paint Nails Techniques
As you become more comfortable with basic techniques, you can explore more advanced methods for acrylic paint nails:
Creating 3D Nail Art
Acrylic paint nails can be used to create 3D nail art. Apply small amounts of paint to your nails and use a sculpting tool to shape the paint into desired forms. Allow the paint to dry completely before applying a top coat.
Marbling Effects
To create a marbling effect, drop small amounts of different colors of acrylic paint into a container of water. Use a toothpick or orange wood stick to swirl the colors together. Dip your nail into the water to transfer the design. Clean up any excess paint with a cotton swab. [See also: Water Marble Nail Art]
Reverse Stamping
Reverse stamping involves painting a design onto a stamper and then transferring it to your nail. This technique allows for more intricate and detailed designs. It works best with stamping polishes but can be achieved with thicker acrylic paint nails paints.
Tips for Achieving Long-Lasting Acrylic Paint Nails
To ensure your acrylic paint nails manicure lasts as long as possible, follow these tips:
- Apply Thin Layers: Thick layers of paint are more prone to chipping and peeling.
- Allow Each Layer to Dry Completely: Before applying the next layer, ensure the previous layer is completely dry.
- Use a High-Quality Top Coat: A good top coat will protect your design and add shine.
- Reapply Top Coat Every Few Days: This will help to prolong the life of your manicure.
- Avoid Harsh Chemicals: Wear gloves when doing housework or working with harsh chemicals.
Troubleshooting Common Issues with Acrylic Paint Nails
Even with careful preparation and application, you may encounter some common issues with acrylic paint nails:
- Chipping: This is often caused by applying thick layers of paint or not allowing each layer to dry completely. Ensure you are applying thin layers and allowing sufficient drying time.
- Peeling: Peeling can be caused by inadequate nail preparation or using low-quality paints. Ensure you are properly prepping your nails and using high-quality acrylic paints.
- Smudging: Smudging typically occurs when the paint is not fully dry before applying a top coat. Be patient and allow the paint to dry completely before sealing it with a top coat.
- Bubbling: Bubbling can be caused by applying the top coat too thickly or shaking the top coat bottle vigorously. Apply the top coat in thin layers and avoid shaking the bottle excessively.
Acrylic Paint Nails: Inspiration and Ideas
The possibilities for acrylic paint nails are endless. Here are some ideas to inspire your next manicure:
- Floral Designs: Delicate floral patterns are a classic choice for nail art.
- Abstract Art: Experiment with abstract shapes, lines, and colors.
- Geometric Patterns: Create bold and modern designs with geometric shapes.
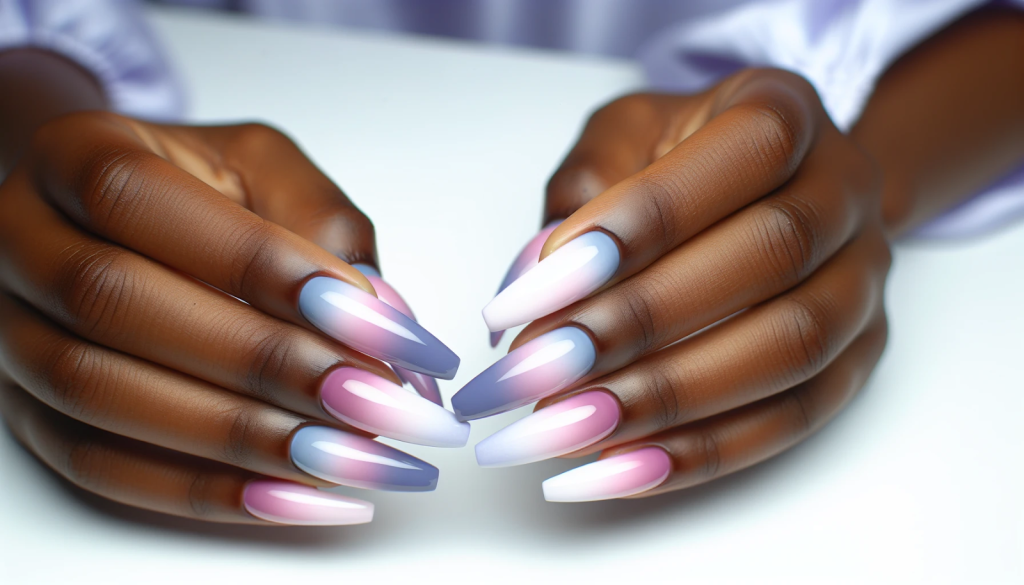
- Ombre Effects: Blend different colors together to create a seamless ombre effect.
- Themed Designs: Celebrate holidays or special occasions with themed nail art.
Safety Precautions When Using Acrylic Paint on Nails
While acrylic paint nails are generally safe, it’s important to take certain precautions:
- Use Non-Toxic Paints: Ensure the paints you use are non-toxic and safe for use on skin.
- Avoid Contact with Eyes and Mouth: Do not ingest the paint or allow it to come into contact with your eyes.
- Work in a Well-Ventilated Area: This will help to prevent inhalation of fumes.
- Wash Your Hands After Use: Wash your hands thoroughly with soap and water after working with acrylic paints.
Conclusion: Unleash Your Creativity with Acrylic Paint Nails
Acrylic paint nails offer a fantastic way to express your creativity and personalize your style. With the right supplies, techniques, and a little practice, you can create stunning nail art designs that are both unique and affordable. From simple patterns to intricate 3D creations, the possibilities are endless. So, gather your supplies, unleash your imagination, and start exploring the world of acrylic paint nails today!
