
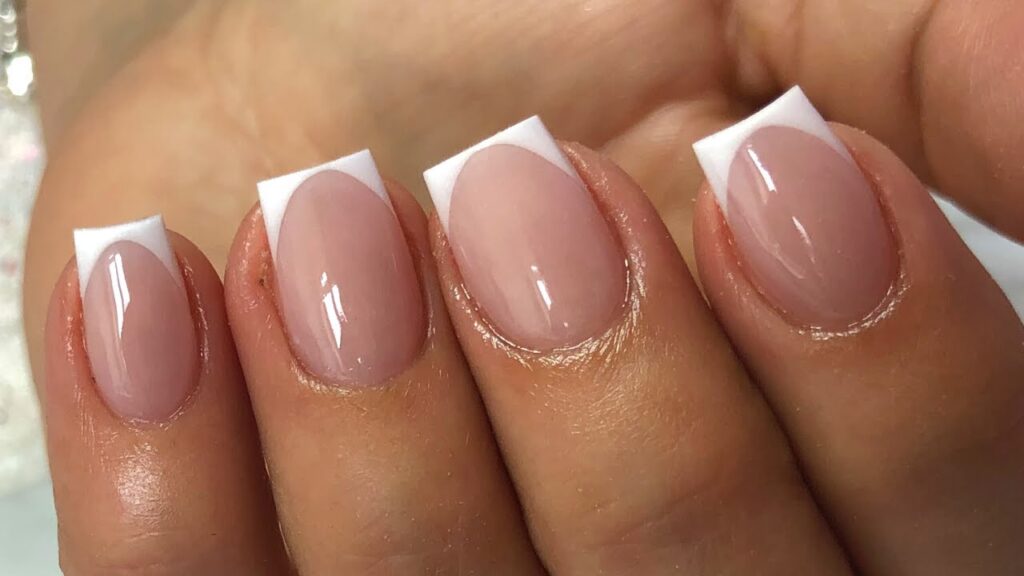
French Tip Acrylic Nails: A Classic and Timeless Manicure
The French tip acrylic nails are a timeless and elegant manicure style that has remained popular for decades. Characterized by a natural-looking nail bed and a crisp, white tip, this design offers a clean and sophisticated aesthetic suitable for any occasion. Whether you’re looking for a polished everyday look or a refined style for a special event, French tip acrylic nails provide a versatile and enduring option. In this comprehensive guide, we’ll delve into the intricacies of achieving the perfect French manicure with acrylics, exploring the application process, design variations, maintenance tips, and everything else you need to know to rock this classic style.
What are Acrylic Nails?
Before diving into the specifics of French tip acrylic nails, it’s essential to understand what acrylic nails are. Acrylic nails are artificial enhancements created by combining a liquid monomer and a powder polymer. This mixture forms a hard, durable layer that is applied over the natural nail. Acrylics can add length, strength, and uniformity to the nails, making them a popular choice for those seeking a flawless manicure.
The Benefits of Acrylic Nails
- Durability: Acrylic nails are known for their strength and resistance to chipping or breaking.
- Customization: They can be shaped and sized to your preference, offering a wide range of design possibilities.
- Longevity: With proper care, acrylic nails can last for several weeks.
- Versatility: Acrylics provide a solid base for various nail art techniques, including the classic French tip.
Achieving the Perfect French Tip with Acrylics
Creating flawless French tip acrylic nails requires precision and attention to detail. Here’s a step-by-step guide to help you achieve a professional-looking manicure:
Step 1: Preparation
Proper preparation is crucial for ensuring the longevity and appearance of your French tip acrylic nails. Start by gathering your supplies:
- Acrylic powder (pink or natural)
- Acrylic liquid monomer
- Acrylic brush
- Nail tips (French tip or regular)
- Nail glue
- Nail file and buffer
- Cuticle pusher
- Cuticle oil
- Dehydrator
- Primer
- White acrylic powder
- Top coat
Begin by cleaning your hands and nails thoroughly. Push back your cuticles gently with a cuticle pusher to create a clean nail bed. Lightly buff the surface of your natural nails to remove any shine and create a better adhesion surface. Apply a dehydrator to remove any oils, followed by a primer to enhance the bond between the natural nail and the acrylic.
Step 2: Applying the Nail Tips
If you’re using regular nail tips (not pre-shaped French tips), apply them to your natural nails using nail glue. Ensure the tips are securely attached and trimmed to your desired length. For French tip acrylic nails, you can use pre-shaped French tips that already have the white tip portion defined. This can save time and ensure a consistent shape.
Step 3: Acrylic Application
Now, it’s time to apply the acrylic. Dip your acrylic brush into the liquid monomer, then gently tap it into the acrylic powder to create a small bead. Apply this bead to the area where the nail tip meets your natural nail, blending it seamlessly. Work your way down the nail, ensuring an even and smooth layer. If you’re using regular tips, use a pink or natural-colored acrylic powder for the nail bed. For pre-shaped French tip acrylic nails, this step helps to blend the tip with the natural nail.
Step 4: Shaping and Filing
Once the acrylic has dried completely, use a nail file to shape the nails to your desired form. Common shapes for French tip acrylic nails include square, oval, almond, and stiletto. Pay close attention to the shape of the white tip, ensuring it is crisp and even. Use a buffer to smooth out any imperfections and create a polished surface.
Step 5: Creating the French Tip (If Necessary)
If you used regular nail tips, you’ll need to create the white French tip using white acrylic powder. Dip your acrylic brush into the monomer and then the white powder, creating a small bead. Carefully apply this bead to the tip of the nail, shaping it into the classic curved French tip. Ensure the line is clean and even on all nails. This step is not required if you’ve used pre-shaped French tips.
Step 6: Finishing Touches
Apply a top coat to seal and protect your French tip acrylic nails. This will add shine and prevent chipping. Allow the top coat to dry completely before applying cuticle oil to moisturize the skin around your nails.
Variations of French Tip Acrylic Nails
While the classic French tip acrylic nails design is timeless, there are numerous variations to explore. Here are a few popular options:
Colored French Tips
Instead of the traditional white tip, experiment with different colors. Pastel shades, bold neons, or metallic hues can add a modern twist to the classic design. [See also: Nail Art Trends 2024]
Glitter French Tips
Add some sparkle by incorporating glitter into the French tip. You can use glitter acrylic powder or apply glitter over the white tip for a dazzling effect.
Ombre French Tips
Create a gradient effect by blending the white tip into the natural nail color. This soft and subtle variation is perfect for those who prefer a more understated look.
Reverse French Tips
Also known as a half-moon manicure, the reverse French tip involves painting a curved line at the base of the nail instead of the tip. This creates a unique and eye-catching design.
Double French Tips
Add a second line of color above or below the traditional white tip for a more intricate design. This can be done with a contrasting color or glitter for added flair.
Maintaining Your French Tip Acrylic Nails
Proper maintenance is essential for keeping your French tip acrylic nails looking their best. Here are some tips to extend the life of your manicure:
- Regular Fills: Schedule regular fill appointments every 2-3 weeks to fill in the gap between the acrylic and your cuticle as your natural nails grow.
- Moisturize: Apply cuticle oil daily to keep your nails and skin hydrated.
- Avoid Harsh Chemicals: Wear gloves when doing household chores or working with chemicals to prevent damage to the acrylic.
- Handle with Care: Avoid using your nails as tools to open packages or scrape surfaces.
- Proper Removal: Never attempt to remove acrylic nails yourself. Always seek professional removal to avoid damaging your natural nails.
The Enduring Appeal of French Tip Acrylic Nails
The French tip acrylic nails continue to be a popular choice for their versatility, elegance, and timeless appeal. Whether you opt for the classic white tip or experiment with modern variations, this manicure style is sure to elevate your look. By following the steps outlined in this guide and maintaining your nails with care, you can enjoy beautiful and long-lasting French tip acrylic nails that make a statement wherever you go. From the initial preparation to the final top coat, mastering the art of French tip acrylic nails is a rewarding endeavor that allows you to express your personal style and confidence.
So, the next time you’re looking for a sophisticated and polished manicure, consider the enduring charm of French tip acrylic nails. With their clean lines and timeless appeal, they are a perfect choice for any occasion, adding a touch of elegance to your overall look. Whether you’re a seasoned nail enthusiast or new to the world of acrylics, the French tip is a classic design that will never go out of style. Embrace the versatility and beauty of French tip acrylic nails and discover the perfect manicure for you.
