
How Do You Clean Your Computer Keyboard: A Comprehensive Guide
In today’s digital age, our computer keyboards are indispensable tools. From crafting emails to writing code, these devices are central to our daily routines. However, keyboards are also notorious for accumulating dust, crumbs, and other grime. Ever wondered, “How do you clean your computer keyboard properly?” Neglecting keyboard hygiene can lead to sticky keys, reduced functionality, and even the spread of germs. This comprehensive guide will provide you with step-by-step instructions and essential tips to keep your keyboard clean, functional, and hygienic.
Why Cleaning Your Keyboard Matters
Before diving into the cleaning process, let’s understand why it’s crucial to maintain a clean keyboard. A dirty keyboard can harbor bacteria, allergens, and even food particles. Over time, this buildup can affect your health and the keyboard’s performance. Regular cleaning prevents the accumulation of unwanted substances, ensuring smooth operation and prolonging the lifespan of your device. Additionally, a clean keyboard enhances the overall aesthetic of your workspace.
Essential Tools and Materials
To effectively clean your computer keyboard, gather the following tools and materials:
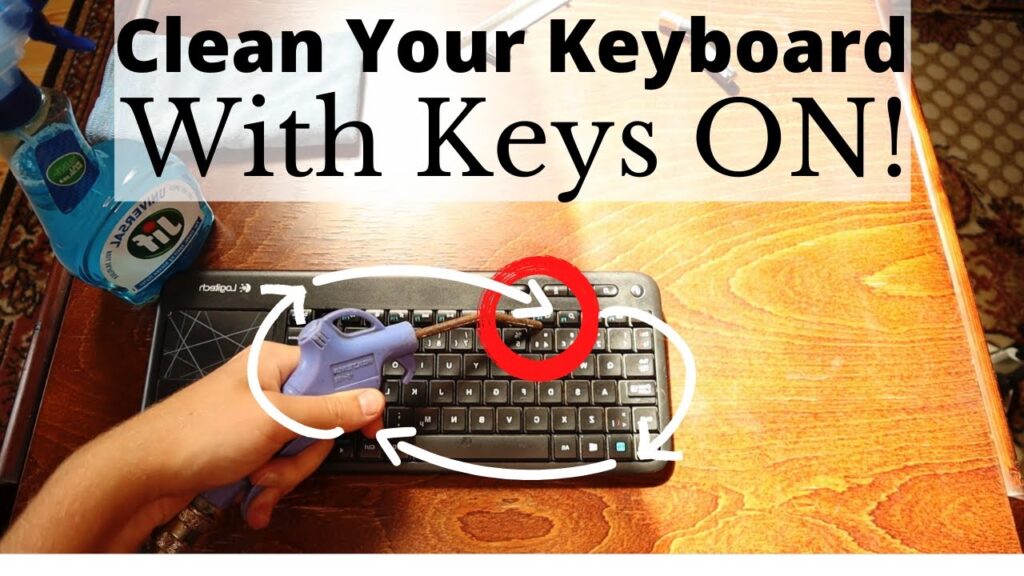
- Compressed Air: Essential for blasting away loose debris from hard-to-reach areas.
- Microfiber Cloth: Ideal for wiping surfaces without scratching.
- Isopropyl Alcohol (70% or higher): A disinfectant that evaporates quickly, minimizing the risk of damage.
- Cotton Swabs: Perfect for cleaning tight spaces and key crevices.
- Keycap Puller (Optional): Simplifies the removal of keycaps for thorough cleaning.
- Small Brush (Soft-Bristled): Helps dislodge stubborn particles.
- Dish Soap (Mild): For washing keycaps if removed.
- Vacuum Cleaner with Brush Attachment (Optional): Useful for removing larger debris.
Step-by-Step Cleaning Process
Step 1: Power Down and Disconnect
Before you begin, turn off your computer and disconnect the keyboard. This prevents accidental keystrokes and potential electrical damage. For wireless keyboards, switch them off and remove the batteries if possible.
Step 2: Remove Loose Debris
Turn the keyboard upside down and gently shake it to dislodge any loose particles. Use compressed air to blast away dust, crumbs, and other debris from between the keys. Focus on hard-to-reach areas and crevices. Avoid holding the compressed air can at an angle, as this can cause liquid propellant to spray out, potentially damaging the keyboard.
Step 3: Wipe Down the Surface
Dampen a microfiber cloth with isopropyl alcohol. Ensure the cloth is not overly wet to prevent liquid from seeping into the keyboard. Gently wipe down the surface of the keys and the surrounding areas. Pay attention to areas that accumulate dirt and grime, such as the spacebar and frequently used keys.
Step 4: Clean Between the Keys
Use cotton swabs dampened with isopropyl alcohol to clean between the keys. Gently rub the swabs along the edges of the keys to remove dirt and grime. Be careful not to apply too much pressure, as this could damage the keys or the keyboard mechanism. A small, soft-bristled brush can also be used to dislodge stubborn particles.
Step 5: Deep Cleaning (Optional)
For a more thorough cleaning, consider removing the keycaps. Use a keycap puller to gently remove each keycap. If you don’t have a keycap puller, you can use a small flathead screwdriver, but be extremely careful not to scratch or damage the keys. Once the keycaps are removed, wash them in warm, soapy water. Rinse them thoroughly and allow them to dry completely before reattaching them to the keyboard. While the keycaps are off, use compressed air and isopropyl alcohol to clean the exposed keyboard surface.
Step 6: Reassemble and Test
After cleaning, ensure all components are completely dry before reassembling the keyboard. Reattach the keycaps, making sure each key is properly aligned and securely in place. Connect the keyboard to your computer and test all the keys to ensure they are functioning correctly. If any keys are sticky or unresponsive, repeat the cleaning process for those specific keys.
Specific Keyboard Types and Cleaning Considerations
Different types of keyboards may require specific cleaning considerations:
Mechanical Keyboards
Mechanical keyboards are known for their durability and tactile feedback. When cleaning a mechanical keyboard, pay extra attention to the switches beneath the keycaps. Use compressed air to remove dust and debris from the switches, and consider using a specialized switch lubricant to maintain smooth operation. [See also: Best Mechanical Keyboards for Gaming]
Laptop Keyboards
Laptop keyboards are more delicate than desktop keyboards. Avoid using excessive liquid when cleaning a laptop keyboard, as it can seep into the internal components and cause damage. Use a slightly dampened microfiber cloth and gently wipe the surface of the keys. For stubborn dirt, use a cotton swab dampened with isopropyl alcohol.
Wireless Keyboards
When cleaning a wireless keyboard, ensure it is turned off and disconnected from your computer. Remove the batteries before cleaning to prevent accidental activation. Be careful not to damage the wireless receiver or the battery compartment.
Preventative Measures
Preventing dirt and debris from accumulating on your keyboard is just as important as cleaning it. Here are some preventative measures you can take:
- Wash Your Hands Regularly: Clean hands reduce the amount of dirt and oil transferred to the keyboard.
- Avoid Eating and Drinking Near Your Keyboard: Food and drinks can easily spill onto the keyboard, causing sticky keys and attracting pests.
- Use a Keyboard Cover: A keyboard cover protects the keys from dust, spills, and other debris.
- Clean Your Keyboard Regularly: Regular cleaning prevents the buildup of dirt and grime, making the cleaning process easier and more effective.
Troubleshooting Common Issues
Even with regular cleaning, you may encounter some common keyboard issues:
Sticky Keys
Sticky keys are often caused by spilled liquids or accumulated grime. Remove the keycap and clean the switch and surrounding area with isopropyl alcohol. Use a cotton swab to gently remove any sticky residue.
Unresponsive Keys
Unresponsive keys may be caused by dust or debris blocking the switch mechanism. Use compressed air to blast away any obstructions. If the key is still unresponsive, consider removing the keycap and cleaning the switch more thoroughly.
Keycap Damage
Damaged keycaps can be replaced. Many online retailers sell replacement keycaps for various keyboard models. Ensure you purchase the correct keycap type and size for your keyboard.
Advanced Cleaning Techniques
For particularly stubborn dirt or grime, consider these advanced cleaning techniques:
Ultrasonic Cleaning
Ultrasonic cleaners use high-frequency sound waves to dislodge dirt and debris. This method is effective for cleaning keycaps and other small keyboard components. However, be cautious when using an ultrasonic cleaner, as it can damage delicate electronic components.
Specialized Cleaning Solutions
Several specialized cleaning solutions are available for keyboards. These solutions are designed to remove dirt, grime, and bacteria without damaging the keyboard. Follow the manufacturer’s instructions carefully when using these solutions.
The Importance of Regular Maintenance
Maintaining a clean computer keyboard is an ongoing process. Regular cleaning and preventative measures are essential for prolonging the lifespan of your keyboard and ensuring its optimal performance. By following the steps outlined in this guide, you can keep your keyboard clean, functional, and hygienic for years to come.
Conclusion
Knowing how do you clean your computer keyboard properly is a crucial skill in maintaining both your equipment and hygiene. Regular cleaning prevents the accumulation of dirt, grime, and bacteria, ensuring smooth operation and prolonging the lifespan of your device. By following the steps and tips outlined in this guide, you can keep your keyboard clean, functional, and hygienic, enhancing your overall computing experience. Remember to disconnect your keyboard before cleaning, use appropriate cleaning materials, and take preventative measures to minimize future buildup. A clean keyboard is a happy keyboard!
