
Homemade Fabric Dye from Acrylic Paint: A Comprehensive Guide
Creating homemade fabric dye from acrylic paint offers a cost-effective and creative way to customize clothing, home décor, and various textile projects. This guide provides a detailed, step-by-step approach to achieving vibrant and lasting colors using readily available materials. Whether you’re a seasoned crafter or a beginner, understanding the process of making homemade fabric dye from acrylic paint will unlock a world of possibilities for personalized designs.
Understanding the Basics of Fabric Dyeing with Acrylic Paint
Before diving into the practical steps, it’s crucial to understand the fundamental principles of using acrylic paint as a fabric dye. Unlike commercial dyes that chemically bond with fabric fibers, acrylic paint essentially coats the fibers. This means proper preparation and application techniques are essential to ensure the color adheres well and withstands washing.
The key to success lies in creating a mixture that allows the paint to penetrate the fabric without making it stiff or prone to cracking. This is achieved by diluting the acrylic paint with a fabric medium, which acts as a binder and helps the paint adhere to the fibers. Without a fabric medium, the paint will likely wash out or crack over time. The type of fabric also plays a significant role; natural fibers like cotton, linen, and silk generally accept the homemade fabric dye better than synthetic fibers.
Materials Needed for Homemade Fabric Dye
Gathering the necessary materials is the first step in creating your homemade fabric dye from acrylic paint. Here’s a comprehensive list:
- Acrylic Paint: Choose high-quality acrylic paints in the colors you desire. Artist-grade paints tend to have better pigment concentration and durability.
- Fabric Medium: This is essential for ensuring the paint adheres to the fabric and remains flexible. Brands like Liquitex or Golden are reputable choices.
- Water: Use clean, lukewarm water to dilute the paint and fabric medium.
- Mixing Containers: Plastic cups or bowls are ideal for mixing the dye.
- Stirring Sticks: Use wooden or plastic sticks to thoroughly mix the dye.
- Paintbrushes or Sponges: Choose brushes or sponges appropriate for your desired application technique.
- Spray Bottle (Optional): For creating ombre or gradient effects.
- Iron and Ironing Board: To heat-set the dye after application.
- Drop Cloth or Newspaper: To protect your work surface.
- Gloves: To protect your hands from the dye.
- Fabric to Dye: Pre-washed and dried fabric is best.
Step-by-Step Guide to Making and Applying Homemade Fabric Dye
Preparing the Fabric
Before dyeing, it’s essential to prepare the fabric properly. Wash the fabric to remove any sizing or finishes that could prevent the dye from adhering correctly. Dry the fabric completely before proceeding.
Mixing the Dye
The key to a successful homemade fabric dye is the right mixture. In a mixing container, combine acrylic paint, fabric medium, and water. A good starting ratio is 1 part acrylic paint, 1 part fabric medium, and 1 part water. However, this can be adjusted based on the desired color intensity and fabric type. For a more transparent look, add more water. For a more opaque look, add more acrylic paint. Mix thoroughly until the mixture is smooth and free of lumps.
Testing the Dye
Before applying the homemade fabric dye to your entire project, test it on a scrap piece of fabric. This will allow you to check the color and consistency of the dye, as well as how it reacts to the fabric. Apply the dye to the scrap, let it dry, and then wash it to see how much color washes out. Adjust the mixture as needed.
Applying the Dye
There are several techniques for applying homemade fabric dye from acrylic paint, depending on the desired effect:
- Brush Application: Use a paintbrush to apply the dye directly to the fabric. This is ideal for creating detailed designs or patterns.
- Sponge Application: Use a sponge to create a more textured or blended look. This is great for backgrounds or abstract designs.
- Spray Application: Pour the dye into a spray bottle and spray it onto the fabric. This is perfect for creating ombre or gradient effects.
- Immersion Dyeing: For a uniform color, immerse the fabric in a container of dye. This method requires a larger quantity of dye and careful monitoring to ensure even coverage.
Regardless of the application method, apply the dye evenly and avoid oversaturating the fabric, which can lead to stiffness or cracking. Work in thin layers, allowing each layer to dry before applying the next.
Drying the Fabric
Once you’ve applied the homemade fabric dye, allow the fabric to dry completely. This may take several hours or even overnight, depending on the humidity and temperature. Avoid placing the fabric in direct sunlight, which can cause the colors to fade.
Heat-Setting the Dye
Heat-setting is a crucial step in making homemade fabric dye from acrylic paint permanent. Once the fabric is completely dry, turn it inside out and iron it on a medium heat setting. Use a pressing cloth to protect the fabric from direct heat. Iron the fabric for 2-5 minutes, focusing on areas where the dye has been applied. This will help to set the dye and prevent it from washing out.
Washing and Caring for Dyed Fabric
After heat-setting, wait at least 24 hours before washing the fabric. When washing, turn the garment inside out and wash it in cold water with a mild detergent. Avoid using bleach or harsh chemicals, as these can damage the dye. Tumble dry on low heat or hang to dry. With proper care, your homemade fabric dye should last for many washes.
Troubleshooting Common Issues
Even with careful preparation and application, you may encounter some common issues when using acrylic paint as a fabric dye. Here are some solutions:
- Color Fading: If the color fades after washing, it may be due to insufficient heat-setting or using too much water in the dye mixture. Try heat-setting the fabric again or using a higher concentration of acrylic paint in the dye.
- Cracking: Cracking can occur if the dye is applied too thickly or if the fabric is not flexible enough. Try applying the dye in thinner layers or using a fabric medium that is specifically designed for flexible fabrics.
- Stiffness: Stiffness can be caused by using too much acrylic paint in the dye mixture. Try diluting the paint with more water and fabric medium.
- Uneven Color: Uneven color can be caused by applying the dye unevenly or by using a fabric that is not evenly absorbent. Try applying the dye in thin, even layers and using a fabric that is pre-washed and dried.
Creative Ideas for Using Homemade Fabric Dye
The possibilities for using homemade fabric dye from acrylic paint are endless. Here are some creative ideas to get you started:
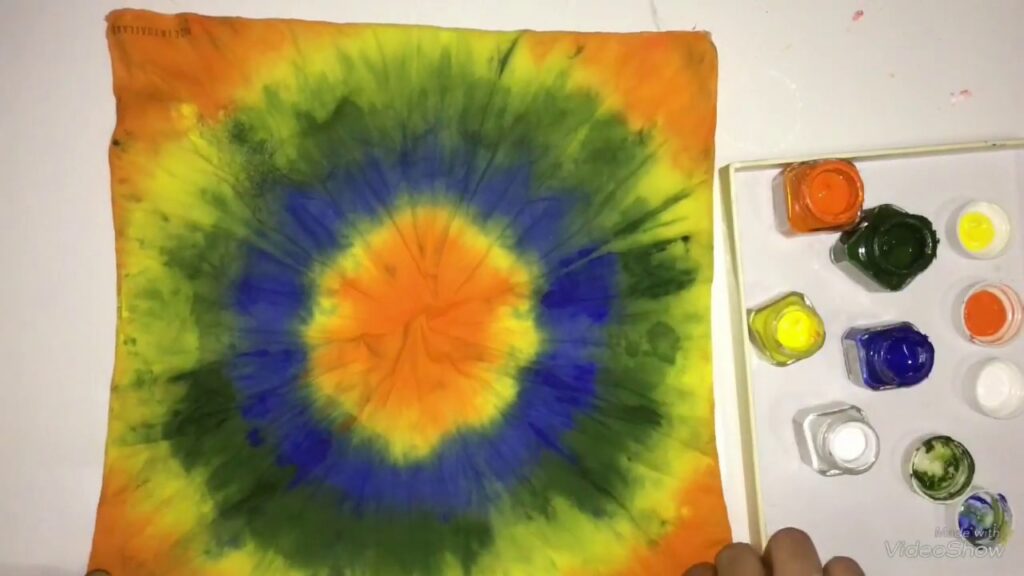
- Tie-Dye: Create unique tie-dye patterns using various colors of homemade fabric dye.
- Ombre Effects: Use a spray bottle to create beautiful ombre or gradient effects on clothing or home décor items.
- Stenciling: Use stencils to create intricate designs and patterns on fabric.
- Hand-Painting: Use paintbrushes to create custom hand-painted designs on clothing, bags, or other fabric items.
- Upcycling: Give old or outdated clothing a new lease on life by dyeing them with homemade fabric dye.
Safety Precautions
When working with acrylic paint as a fabric dye, it’s essential to take certain safety precautions:
- Ventilation: Work in a well-ventilated area to avoid inhaling fumes from the paint and fabric medium.
- Protective Gear: Wear gloves to protect your hands from the dye and a mask to avoid inhaling fumes.
- Eye Protection: Wear safety glasses to protect your eyes from splashes.
- Storage: Store acrylic paints and fabric mediums in a cool, dry place, away from children and pets.
- Disposal: Dispose of leftover dye and materials properly, following local regulations.
Conclusion
Creating homemade fabric dye from acrylic paint is a rewarding and cost-effective way to customize your textiles. By following the steps outlined in this guide and taking the necessary precautions, you can achieve beautiful and lasting results. Experiment with different colors, techniques, and fabrics to create unique and personalized designs. Embrace the creative process and enjoy the satisfaction of transforming ordinary fabrics into extraordinary works of art. With a little practice and patience, you’ll be amazed at what you can achieve with homemade fabric dye. Remember to always test your dye mixture, properly heat-set the fabric, and care for your dyed items to ensure long-lasting results. Happy dyeing!
[See also: Best Fabric Dyes for Cotton]
[See also: Natural Dyes for Fabrics]
[See also: How to Tie Dye a Shirt]
