Kitchen Sink Leak? A Comprehensive Guide to Identifying and Fixing It
Discovering a kitchen sink leak can be a homeowner’s nightmare. From the irritating drip-drip-drip sound to the potential for water damage, a kitchen sink leak demands immediate attention. This comprehensive guide provides a clear, step-by-step approach to identifying the source of the kitchen sink leak and offers practical solutions for fixing it, saving you time, money, and potential headaches. Let’s dive in and tackle that kitchen sink leak head-on.
Understanding the Anatomy of Your Kitchen Sink
Before you can fix a kitchen sink leak, it’s essential to understand the different components that make up your sink’s plumbing system. Familiarizing yourself with these parts will make it easier to pinpoint the source of the problem.
- Faucet: The fixture that controls the flow of water. Leaks can occur at the base, spout, or handles.
- Supply Lines: Flexible tubes that connect the faucet to the hot and cold water shut-off valves.
- Shut-Off Valves: These valves control the water supply to the faucet. They’re crucial for turning off the water before making any repairs.
- Sink Basin: The bowl-shaped part of the sink that holds water. Leaks can occur around the drain or where the sink meets the countertop.
- Drain Assembly: This includes the drain flange, strainer basket, rubber stopper, and tailpiece.
- P-Trap: The curved pipe under the sink that traps debris and prevents sewer gases from entering your home.
- Drain Pipes: These pipes carry wastewater away from the sink.
Identifying the Source of the Kitchen Sink Leak
The first step in fixing a kitchen sink leak is to identify where the water is coming from. This requires careful observation and a systematic approach. Here’s how to do it:
- Clear the Area: Remove everything from under the sink to get a clear view of the plumbing.
- Dry the Area: Use towels or paper towels to dry all the pipes and connections. This will make it easier to spot the leak.
- Run the Water: Turn on the faucet and observe carefully. Check for leaks around the base of the faucet, the spout, and the handles.
- Check the Supply Lines: Feel the supply lines for moisture. Look for any signs of corrosion or damage.
- Inspect the Drain Assembly: Fill the sink with water and then let it drain. Watch for leaks around the drain flange, strainer basket, and tailpiece.
- Examine the P-Trap: Check the P-trap for leaks, especially at the joints.
- Look for Condensation: Sometimes, what appears to be a leak is actually condensation forming on cold pipes. If this is the case, you may not need to make any repairs.
Common Causes of Kitchen Sink Leaks and How to Fix Them
Once you’ve identified the source of the kitchen sink leak, you can begin to address the problem. Here are some common causes and their solutions:
Loose Connections
One of the most common causes of kitchen sink leaks is loose connections. Over time, the nuts and fittings that hold the pipes together can loosen, allowing water to escape. To fix this, simply tighten the connections with a wrench. Be careful not to overtighten, as this can damage the pipes.
Worn-Out Washers and O-Rings
Washers and O-rings are rubber seals that prevent water from leaking around connections. These seals can wear out over time, becoming brittle and cracked. To replace a worn-out washer or O-ring, turn off the water supply, disconnect the fitting, and remove the old seal. Then, install a new seal and reassemble the fitting.
Corroded Pipes
Corrosion can weaken pipes, causing them to leak. If you notice corrosion on your pipes, it’s important to address the problem before it gets worse. In some cases, you may be able to clean the corrosion with a wire brush and apply a sealant. However, if the corrosion is severe, you may need to replace the affected section of pipe.
Damaged Faucet
Leaks can also occur within the faucet itself. This could be due to a worn-out cartridge, a damaged O-ring, or a cracked faucet body. To repair a faucet leak, you’ll need to disassemble the faucet and replace the damaged parts. [See also: How to Replace a Kitchen Faucet Cartridge] Faucet repair kits are available at most hardware stores.
Clogged Drain
A clogged drain can cause water to back up into the sink, leading to leaks around the drain flange. To clear a clogged drain, try using a plunger or a drain snake. You can also try pouring a mixture of baking soda and vinegar down the drain, followed by hot water. [See also: DIY Drain Cleaning Solutions] If these methods don’t work, you may need to call a plumber.
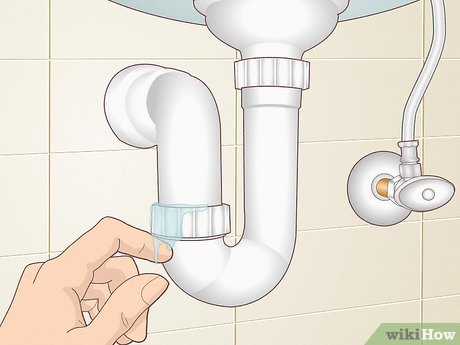
Leaky P-Trap
The P-trap can leak at the joints or due to damage to the pipe itself. Tighten the slip nuts at the joints first. If the P-trap is damaged, it’s relatively inexpensive and easy to replace. Simply loosen the slip nuts, remove the old P-trap, and install the new one.
Tools and Materials You’ll Need
Before you start any repairs, make sure you have the necessary tools and materials. Here’s a list of essentials:
- Adjustable Wrench: For tightening and loosening nuts and fittings.
- Basin Wrench: For reaching hard-to-access nuts on the faucet.
- Screwdrivers: Both Phillips head and flathead screwdrivers.
- Pliers: For gripping and holding parts.
- Plumber’s Tape: For sealing threaded connections.
- Replacement Washers and O-Rings: Assorted sizes for different connections.
- Bucket: To catch any water that may spill.
- Towels: To clean up spills and dry parts.
- Safety Glasses: To protect your eyes from debris.
- Gloves: To protect your hands.
Step-by-Step Guide to Fixing a Leaky Kitchen Sink Drain
Here’s a general step-by-step guide to fixing a leak in your kitchen sink drain. Always remember to turn off the water supply before starting any plumbing repairs.
- Turn off the water supply: Locate the shut-off valves under your sink and turn them clockwise to stop the water flow.
- Prepare the area: Place a bucket under the drain to catch any water that may be trapped in the pipes.
- Loosen the slip nuts: Use an adjustable wrench to loosen the slip nuts that connect the drain pipes.
- Inspect the drain pipes: Carefully examine the drain pipes for any cracks, damage, or corrosion. If you find any, you may need to replace the affected section of pipe.
- Replace washers and O-rings: Check the washers and O-rings at the connections. If they are worn out or damaged, replace them with new ones.
- Reassemble the drain: Once you have inspected and replaced any necessary parts, reassemble the drain pipes. Tighten the slip nuts securely, but be careful not to overtighten.
- Test for leaks: Turn on the water supply and check for leaks. If you still see leaks, tighten the connections further or re-examine the pipes for damage.
When to Call a Plumber
While many kitchen sink leaks can be fixed with basic tools and skills, there are times when it’s best to call a plumber. If you’re not comfortable working with plumbing, or if you’ve tried to fix the leak yourself and it’s still leaking, it’s time to call a professional. A plumber can quickly diagnose the problem and make the necessary repairs. Additionally, if you suspect a more serious plumbing issue, such as a burst pipe or a sewer line problem, it’s important to call a plumber immediately.
Preventing Future Kitchen Sink Leaks
Prevention is always better than cure. Here are some tips to help prevent future kitchen sink leaks:
- Regularly Inspect Your Plumbing: Check under your sink periodically for any signs of leaks or corrosion.
- Tighten Loose Connections: Tighten any loose nuts or fittings as soon as you notice them.
- Replace Worn-Out Parts: Replace worn-out washers, O-rings, and other parts as needed.
- Avoid Overloading Your Sink: Avoid putting too much weight or pressure on your sink, as this can damage the drain assembly.
- Be Careful What You Put Down the Drain: Avoid pouring grease, oil, or other harmful substances down the drain, as this can clog the pipes and lead to leaks.
Conclusion
A kitchen sink leak can be a nuisance, but with the right knowledge and tools, you can often fix it yourself. By understanding the anatomy of your sink, identifying the source of the leak, and following the steps outlined in this guide, you can save yourself time and money. However, if you’re not comfortable working with plumbing, or if the leak is severe, don’t hesitate to call a professional plumber. Remember, regular maintenance and preventative measures can help you avoid future kitchen sink leaks and keep your plumbing system in good working order. Addressing a kitchen sink leak promptly not only prevents water damage but also contributes to water conservation and a more sustainable home.
